High temperature quality inspection
With metrology-grade selective scanning at a distance of up to 60 metres, the Leica Absolute Tracker ATS600 is delivering time and raw material savings in new areas of production.

Technical article - Leica Absolute Tracker ATS600, part 2
When it comes to the forging of large components, there are some very sound reasons for investing in a measurement technology that can ensure the forged part is as close as possible to the desired dimensions of the final workpiece. On the one hand, an oversized forging can result in a significant waste of time and material as excessive machining is required to bring the raw forged part within design tolerance. On the other hand, a forged part that comes out undersized is an even greater problem, as the entire piece may need to be scrapped if it is not large enough in any single dimension to accommodate the design of the final part. This of course results in an even greater loss of time and material.
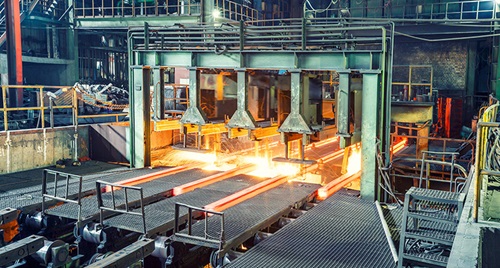 Dimensional inspection is the natural answer to this challenge, but this is a difficult process when extreme temperatures are involved – the typical tools of metrology are simply not capable of withstanding the 1000°C temperatures seen in the forging of large metal parts.
The Leica Absolute Tracker ATS600 is a state-of-the-art laser tracker that offers a solution to this problem through its long-distance direct scanning functionality. Direct scanning is a feature that allows the tracker to measure points on a surface from a distance of up to 60 metres with accuracy in the range of tenths of millimetres.
At this distance from the heated part, the extreme temperature is no problem for the ATS600, and with accuracy on glowing-hot parts maintained at sub-millimetre levels, parts can be directly forged to a size much closer to the final required dimensions than is typically possible.
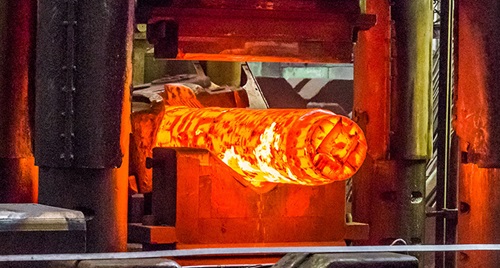 This direct scanning function is unique to the ATS600 among laser trackers. It is similar to the hemispherical scanning performed by terrestrial laser scanners for surveying purposes, but at a significantly greater accuracy and with the ability to target smaller measurement areas with selective scanning, rather than collect data for a wide area that must subsequently be filtered. The ATS600 is also able to deliver immediate results thanks to its integration with standard metrology software processes, which allow for the direct comparison of actual to nominal dimensional values.
Forging isn’t the only application in which high temperatures cause problems in performing accurate measurements. In the cement industry, kiln alignment is a crucial regular task. Cement kiln misalignment can cause excessive forces which lead to wear on components such as gears, bearings, riding rings and rollers. This can lead to extremely expensive kiln failures well before the expected lifetime of the kiln is reached.
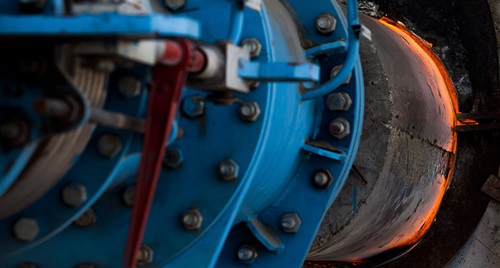 And even before failure, kiln misalignment can result in an inefficient process that costs more time and resources than needed. The kiln stage is the main energy-consuming and greenhouse-gas producing step in the process of cement manufacture, so any efficiency improvements are highly coveted in the industry.
Alignment is therefore very important, but it is not however simple. This is due to the high temperatures reached during the pyroprocessing stage in the manufacture of hydraulic cement – at certain points in the process the kiln will reach temperatures of up to 1450°C.
Again, the ATS600 and its direct scanning functionality delivers a solution through the ability to measure a selected area accurately from a distance. When the kiln is heated it’s certainly not possible to place reflectors or targets across the cylinder to verify and correct the alignment.
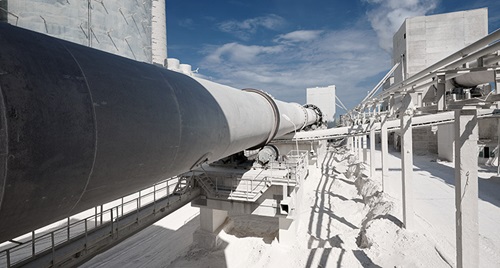 Using the Panorama Imaging and Line Scan modes of the ATS600, a simple and fast measurement of only the areas of the kiln needed to define the alignment can be carried out by a single user, allowing for very regular alignment checks that ensure high efficiency and reduce unnecessary wear.
New areas of production in which direct scanning can be usefully applied across a wide range of industries have been uncovered regularly since the launch of the ATS600 in 2019. As quality and production engineers become more familiar with this ground-breaking metrology technology, there can be no doubt that many more interesting applications will soon be discovered.
