Optimising tension rod measurement
How to use a Shop-Floor CMM to inspect critical automotive components
Contact us

The tension rod is a component many take for granted when it comes to driving – and indeed braking – in their cars. However, if a tension rod were made inaccurately, drivers would soon notice.
Positioned between the vehicle chassis and a suspension track control arm, tension rods stop the wheels from moving back and forth when braking. Inaccurately measured tension rods could cause vehicle pulling and unnecessary tyre wear, as well as steering problems due to wheel misalignment and potentially dangerous reductions in friction when braking. Without proper clearance, they could cause binding or fouling of the wheels.
Tension rods are typically made of stainless steel or aluminium and often manufactured using precision computer numerical control (CNC) machining. Although straight-type designs are commonly used, some tension rods feature heavy welded control arms with kinks to help increase tyre clearance and ensure the fixtures don’t come loose. With global demand for vehicles increasing, tension rod suppliers need to combine the necessary inspection accuracy with high throughput to ensure they remain competitive. As a result, many manufacturers want to bring their inspection processes closer to the point of production. This means the optimal measuring solution needs to be shop-floor ready and capable of measuring reliably in harsh and regularly changing environmental conditions.
A robust solution ready for the factory floor
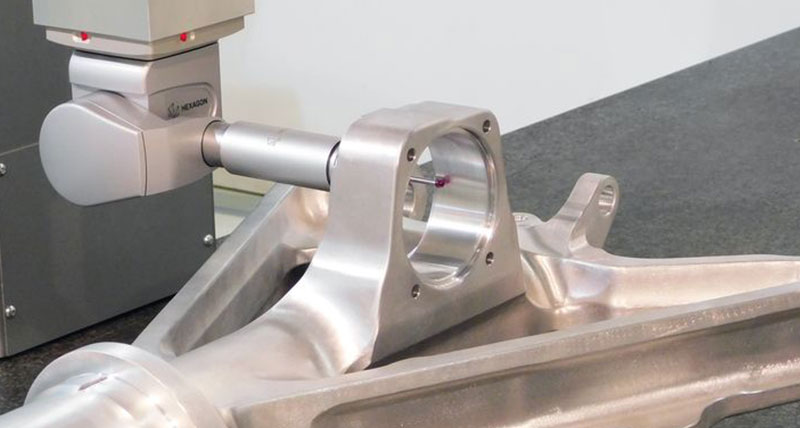
The GLOBAL-S coordinate measuring machine (CMM) configured with the Shop-Floor capability package is optimised for near-the-line measurement. Bellows and covers provide the machine’s mechanics with extra protection from dust, dirt and other contaminants to ensure operation at specified performance in harsh production conditions, while advanced temperature compensation algorithms ensure reliable results in fluctuating workshop temperatures. The PULSE environmental monitoring system tracks variations in temperature and vibrations and automatically alerts users when environmental condition thresholds are breached. The CMM can also be equipped with LED messaging lights, allowing users to check machine status from a distance and, combined with automated inspection routines, optimise their time for other tasks.
In addition, tension rod manufacturers may also require the ability to integrate a measuring solution into a fully-automated manufacturing process. GLOBAL S is ideal for integration into a robotic cell due to its automated measurement operations and its ability to deliver quality data to production in a timely manner for immediate feedback. Data is easily communicated through the rest of the factory through a range of connectivity technology, including statistical systems and I/O capabilities. Whether the manufacturer is looking to implement a robotic cell immediately or in the future, the increased throughput and ability to analyse process data over a period of time offers considerable added-value to overall quality management.
Primed for versatility
Tension rod inspection requires high accuracy, making contact measurement the optimal scanning method to decrease uncertainty and increase repeatability. GLOBAL S enhances the measurement of tension rods with a wide range of available stylus options to help access more intricate features. Greater measuring versatility and reduced cycle times are achieved by combining the HP-S-X1H sensor with the HH-AS8-T2.5 indexing probe head, which allows 12 240 unique positions so parts can be measured with optimum probe attitude.
The versatility, small footprint and high-speed optimisation of the GLOBAL S makes it perfect for the scalable production of tension rods varying in size. Its readiness for shop-floor integration and potential inclusion in an automated robotic cell means GLOBAL S is the ideal solution for optimising workflows and reducing overall time-to-market.
