Optical quality control in precision casting
The third dimension of turbine wheels
Contact us

Quality control as a metrological challenge: The quality of precision casting products down to the minute micrometer can only be accomplished through the components’ third dimension. A leading manufacturer in the metal processing industry, in its 300 years of corporate history the company Zollern has developed and perfected a broad spectrum of metal treatment and processing techniques in which high standard requirements with regard to integral quality inspections have always played a significant role: Thanks to the high precision three-dimensional scan data generated by the AICON StereoScan molds wax templates and finished cast parts are inspected with the necessary efficiency and accuracy.

Objective and measuring object
The term ,precision casting’ (also referred to as ‘investment casting‘) in itself indicates the characteristics of the products manufactured by Zollern: They are primarily small and at prime precision manufactured cast parts weighing between 1 g and 10 kg, such as turbine wheels, blenders for gas turbines, and nozzle vanes. The method of investment casting provides optimum scope for shaping and constructing which is unmatched by any other casting technique. It allows for the realization of technical solutions and specialized products which other methods are not capable of accomplishing at all, or only at much higher costs.
To achieve top standard product quality, the quality of an Inconell turbine rotor for exhaust turbo chargers is defined in millimeters: The dimensions are within a very narrow tolerance range and have to be repeatedly verified in the course of the production process. Given the continuously growing complexity of these components, tactile inspection methods by means of coordinate measurement machines (CMM) can no longer keep up both with regard to time and quality. Moreover, the results of a CMM have to be interpreted and explained by a metrology expert. This is where Jürgen Weber, coordinator at the investment casting inspection department, emphasizes on measuring protocols to be easily comprehendible and flexible in their format in order that the results to be communicated swiftly and easily and understood not only internally, but also by the customer.
Measuring system and setup
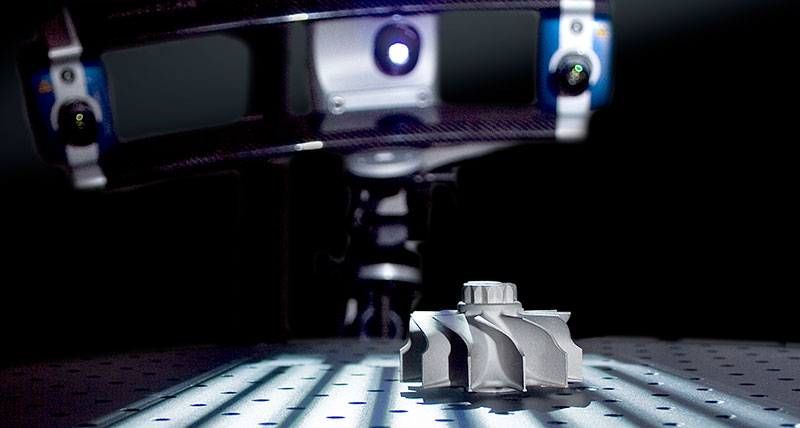
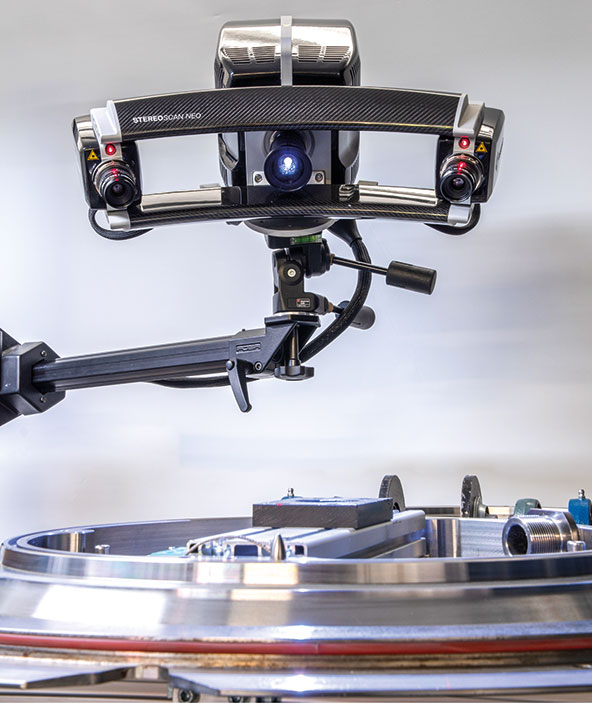
In the context of their in-line quality inspection, Zollern works with the AICON StereoScan. This high-performance measuring system is not a 3D scanner bought “off the rack”, but rather is characterized by its high degree of flexibility: Based on project preparing tests together with the long standing know-how and experience of the AICON system technicians, the measuring field, the required illumination, the resolution of the cameras, as well as the automation level are adjusted exactly to the Zollern production requirements.
 The inspection tasks in investment casting are diverse: Besides applications in research and development, the 3D measuring system is also used for in-line quality control and assurance. In this context the wax model of the turbine wheel, for example, is captured three-dimensionally in order to carry out a target versus nominal comparison against its CAD construction data or, using a bisected model, to measure its interior geometry.
Furthermore, the high precision measuring data is used in the first sample inspection phase as well as for corrective adjustments of the tooling. After all, during mass production 3D precision is of the essence when it comes to maintaining the required quality standards: This is where shape compliance of the cast parts is verified in spot tests; under verification are, for example, the overall diameter of the turbine wheel or the transitions from the wheel hub to each individual blade.
The three-dimensional quality inspection of a turbine blade is carried out with the AICON StereoScan using a small measuring field ensures the high level detail resolution required in this project. The turbine wheel to be inspected is digitized in the following steps: After the 3D scanner, the measuring object and the turntable have been set-up and configured, the sensor apparatus (i.e. the cameras and the light projection unit) are calibrated.
In the actual scanning process, first individual data captures of the turbine wheel are generated, aligned and merged to a coherent polygon mesh with the aid of the AICON software OPTOCAT. The standard angles used in the aerial measuring optical sensors fitted in coordinate measuring machines are not capable of capturing deep rib-like textures with the required degree of precision. The flexible sensor configuration of the AICON scanner, on the other hand, allows for additional data acquisitions by using triangulation angles of 30°, 20°, and 10°, making it possible to measure even those object areas of various sized and shaped cast parts which are very challenging to access with the necessary high accuracy to detail.
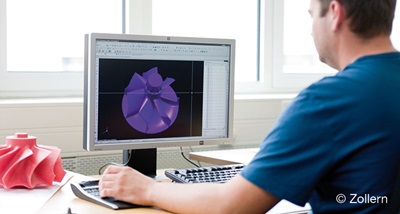
In a second step, the scan data is evaluated by means of an inspection software (in this case (PolyWorks/Inspector™ by InnovMetric Software Inc.), in order to assess the pre-defined inspection parameters, such as standard geometry patterns, cross-sections or deformations. To do so, customizable measuring report formats are available which, among others, can be exported as 2D or 3D false color representations, tables with nominal values and tolerances or cross-section views.

Conclusion
Thanks to the easily and swiftly evaluable measuring data generated by an AICON StereoScan, process parameters can be optimized promptly and timely, thus supporting Zollern in maintaining consistent efficiency for the production of prime quality turbine wheels. The laborious data acquisition and evaluation with a coordinate measuring machine is no longer necessary: Using the third dimension of the digitized turbine wheel not only allows shape deviations to be detected faster, better and more efficiently, but also helps to reduce time and costs.
Jürgen Weber summarizes: “In comparison with a CMM, the data acquisition with the AICON scanner is extremely time effective, enabling us to quickly obtain the evaluated data. Besides, the StereoScan provides us with additional benefits, since we are also using the 3D data in connection with other types of investment casting parts, for instance for the simultaneous precision measurement of up to 20 ceramic cast cores for turbine blades.”
Using an appropriately adjusted configuration, Jürgen Weber furthermore employs the scanner for the quality inspection of large sized cast parts: Also in respect to these components, the fringe projection system delivers considerably better data quality in the submillimeter measuring accuracy range, a significantly higher resolution as well as a much easier handling both with regard to system operation and data evaluation when compared with a coordinate measuring machine or a high-end laser scanner. Result are the consistently high quality cast products globally associated with the brand name Zollern.
We give thanks to the Zollern employees for their cooperation and support in creating this report.
