Optimising precision casting
Using advances in laser line scanning to raise productivity and increase flexibility in investment casting
Contact us

Precision casting manufacturers serve industries that demand the highest levels of quality. The aerospace, automotive, medical and energy industries turn to precision casting partly because it’s the most cost-effective way to produce a part with complex geometries as a single metal piece without welding. But it’s not the only advantage of the process.
In addition to providing a great degree of dimensional accuracy for intricate parts, precision casting, also known as investment casting, offers design flexibility and an excellent surface finish. It also allows manufacturers to use almost any metal to make a part, whether it’s aluminium, steel, or nickel-based. Among the many components that benefit from precision casting are blades and pulleys in the aerospace field, impellor and compressor wheels and clutch components in the automotive sector.
It’s an ancient process that lends itself to the production of both very low volumes of prototypes and high volumes of in-demand components. But that doesn’t mean precision casting companies can take an artisanal approach to manufacturing. They need to run cost-efficient, flexible, high-availability operations if they are to meet their customers’ requirements for affordability, excellence and mass production. The aerospace industry, for example, faces an unprecedented demand for new aircraft, which has resulted in a backlog of aircraft orders that companies throughout the supply chain need to work through efficiently.
But although every investment casting manufacturer performs dimensional measurement, methods differ between individual companies. Choosing the solution that best combines speed, precision, affordability and versatility gives an investment casting manufacturer a strong competitive edge.
While tactile measurement offers the highest precision it is time consuming, making it a costly approach that can dent productivity.
Because precision casting components require measurement of complex geometries, freeform surface laser line scanning can be the best option. Laser line scanners that use colour mapping can show whether enough material is present in the casting to accurately produce the final component. Additionally, laser scanning can also help the operator find the optimum machining set up, decreasing the inspection process further.
New, affordable, high-precision laser scanning tools are entering the market, which make it even faster to capture the design features of intricate parts made of either ferrous or non-ferrous cast metals and identify potential sources of error.
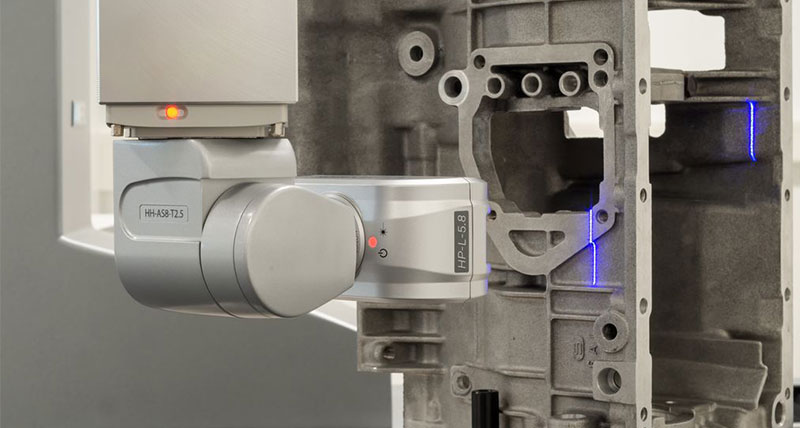
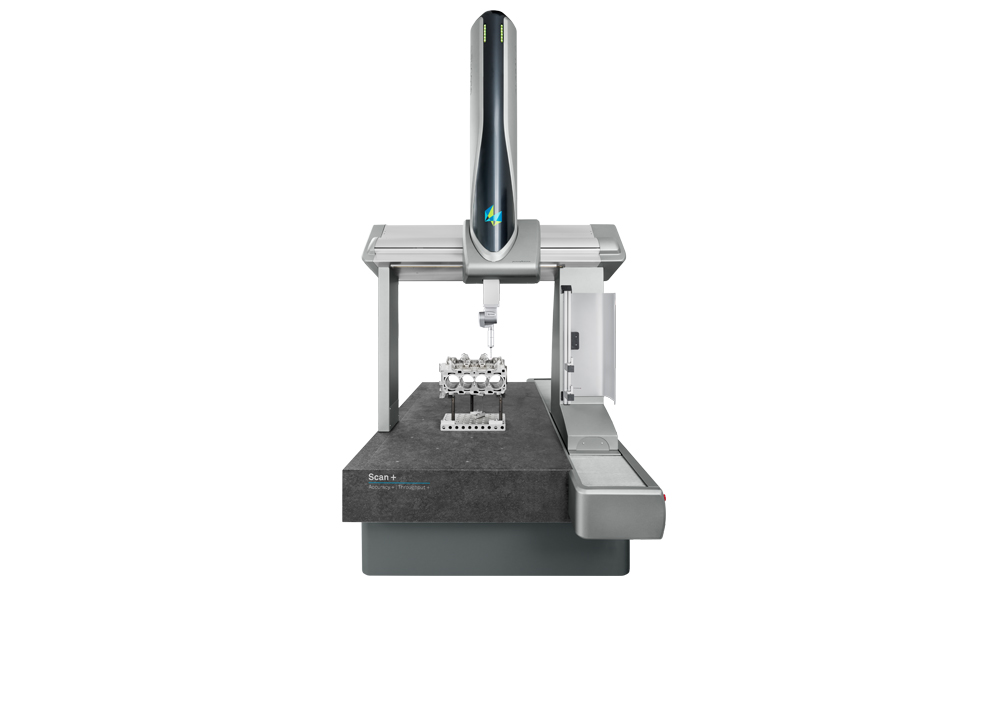
Hexagon’s GLOBAL S Green CMM, equipped with the new HP-L 5.8 non-contact blue line laser scanner and PC-DMIS metrology software, enable precision casting manufacturers to capture entire measurement surfaces affordably and at much greater speed than traditional tactile probing.
Designed for affordability and ease-of-use, the system rapidly captures thousands of points to generate point clouds. The resulting 3D view simplifies the investigation of surface sections of a component. It works equally well on shiny and less reflective surfaces and because it is contactless it can be used on any material without risk of damage.
Combined with tactile probing, it gives manufacturers a flexible, affordable way to balance precision requirements with the demand to achieve higher throughput.
In addition to providing a great degree of dimensional accuracy for intricate parts, precision casting, also known as investment casting, offers design flexibility and an excellent surface finish. It also allows manufacturers to use almost any metal to make a part, whether it’s aluminium, steel, or nickel-based. Among the many components that benefit from precision casting are blades and pulleys in the aerospace field, impellor and compressor wheels and clutch components in the automotive sector.
Mass-producing excellence
Investment casting involves creating a master die that captures the precise dimensional specifications of the finished product. From this, manufacturers create what is called a wax pattern – even if today it isn’t necessarily made from wax. The wax pattern is then coated in successive layers of ceramic to create a hard mould, which is in turn fired to remove the wax before molten metal is poured into or around the mould to create the finished part.It’s an ancient process that lends itself to the production of both very low volumes of prototypes and high volumes of in-demand components. But that doesn’t mean precision casting companies can take an artisanal approach to manufacturing. They need to run cost-efficient, flexible, high-availability operations if they are to meet their customers’ requirements for affordability, excellence and mass production. The aerospace industry, for example, faces an unprecedented demand for new aircraft, which has resulted in a backlog of aircraft orders that companies throughout the supply chain need to work through efficiently.
Gaining a competitive edge
Stringent dimensional measurement controls are part of the investment casting industry’s DNA. The precision of the final part depends on manufacturers controlling dimensional accuracy at every stage of production from the creation of the master pattern or master die, to the development of the wax pattern and the ceramic mould, through to the inline measurement of the finished cast part.But although every investment casting manufacturer performs dimensional measurement, methods differ between individual companies. Choosing the solution that best combines speed, precision, affordability and versatility gives an investment casting manufacturer a strong competitive edge.
While tactile measurement offers the highest precision it is time consuming, making it a costly approach that can dent productivity.
Because precision casting components require measurement of complex geometries, freeform surface laser line scanning can be the best option. Laser line scanners that use colour mapping can show whether enough material is present in the casting to accurately produce the final component. Additionally, laser scanning can also help the operator find the optimum machining set up, decreasing the inspection process further.
A clear view
The right combination of scanning hardware and measurement software not only makes controlling precision cast components faster and more cost-effective, it provides quality engineers with a 3D view of the different sections of a part, allowing them to quickly identify errors.New, affordable, high-precision laser scanning tools are entering the market, which make it even faster to capture the design features of intricate parts made of either ferrous or non-ferrous cast metals and identify potential sources of error.
Hexagon’s GLOBAL S Green CMM, equipped with the new HP-L 5.8 non-contact blue line laser scanner and PC-DMIS metrology software, enable precision casting manufacturers to capture entire measurement surfaces affordably and at much greater speed than traditional tactile probing.
Designed for affordability and ease-of-use, the system rapidly captures thousands of points to generate point clouds. The resulting 3D view simplifies the investigation of surface sections of a component. It works equally well on shiny and less reflective surfaces and because it is contactless it can be used on any material without risk of damage.
Combined with tactile probing, it gives manufacturers a flexible, affordable way to balance precision requirements with the demand to achieve higher throughput.

