A quantum leap
Pistol - Germany
Contact us

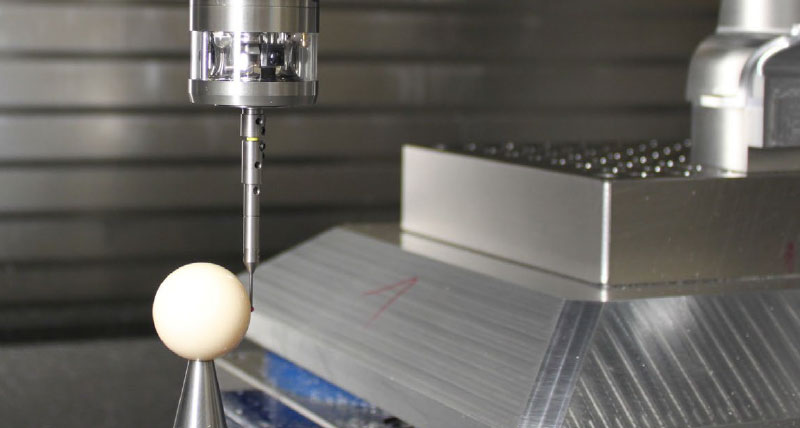
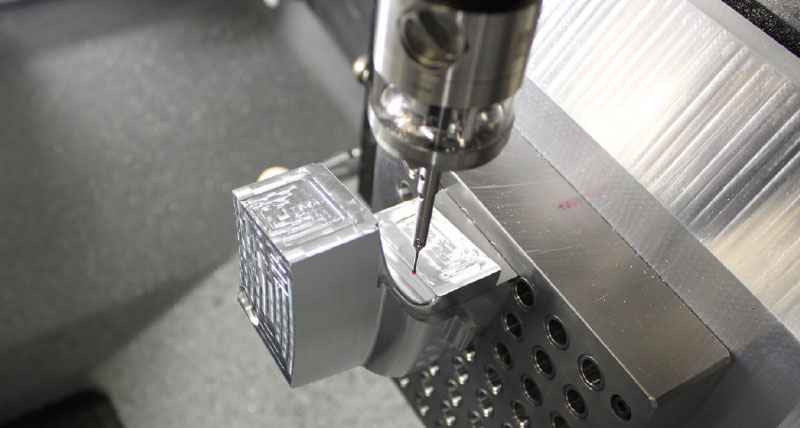
Using touch probes and software for measuring workpieces while still clamped, the Pistol GmbH of Zwenkau manufactures tools with extremely fine structures for wax and ceramic injection in investment foundries.
Originating from an engineering company found-ed in 1994 which focused on the problem of precision casting, the Pistol GmbH of Zwenkau in Saxony, located before the gates of Leipzig, has specialized as a supplier of investment foundries. It manufactures moulds, gauges, accessory tools as well as wax models from its own wax injection operation.
In addition to the wax models made to customer order, all forms from its own tool manufacturing are sampled. This ensures tools which are safe in terms of both fit and function and reduces the time until their implementation at the customer‘s site.
 Investment casting is a precision casting procedure. Accordingly, the precision of the forms plays a prom-inent role. Especially since internally cooled turbine blades and other precision castings usually have very narrow tolerances such as a few tenths in the cast product. Milling has always been the preferred man-ufacturing method. Wherever possible, contours are milled to finish while adjacent methods are minimized. At the same time, Pistol employees started to measure the forms while they were still being clamped in the machine. For many years, m&h touch probes and 3D Form Inspect Software have been used for this. „This is a tool for our operators which is used as naturally as a calliper,“ says the CEO, Mr. Gert Pistol. „We work in two shifts in tool manufacturing, and the measurement protocols allow the operator to directly check his work. Due to the logs, errors are detected early and production loops are avoided. Beyond this, loss of information due to production extending over several shifts are largely excluded.“
The first checks of the three-dimensional contours in the clamping were conducted as early as 1997. The 3D Form Inspect program compares the target data of the CAD design of the workpiece with the actual values on the workpiece in the machine. For this, the machine operators can call up the location to be measured and the desired measurement function at any time with simple mouse clicks.
With the CAD data, predefined measurement points can be transferred. The program, including the collision control for the machine, works in the background. In the machine, this program is called up and executed like any other processing program. With this, a new program using the measured values is automatically written which is then transmitted back to the computer and makes the measured values visible directly at the computer. They can be printed as a measurement protocol or saved as a data set. Any measurement program is preceded by a patented short calibration which determines the current thermal changes of the machine axes and considers them in the output of the measured values. 3D Form Inspect measures with all 5 axes and compensates the tilting errors of the 4th and 5th axis. In this way, the software guarantees consistently reliable and repeatable values at any time, just as the ones measured on a measuring machine.
„To our knowledge, there was nothing else that fulfilled such a function. It was a quantum leap for us,“ says Gert Pistol. „It used to be that if something did not fit, we would realize this only when assembling it. Now we can identify and correct deviations at an early stage. Reworking and rejects have been drastically reduced. „Pistol company now has two 3D Form Inspect soft-ware licenses which alternately supply measuring programs to the three five-axis and three three-axis machines by the manufacturers Hermle, DMG and OPS.
Even the Best Fit software module by m&h is in use at Pistol. With its help, the critical contours can be used to determine the exact position of the workpiece in its clamping. The measured values are then used for rotating and shifting the coordinate axes in the ma-chine control for multi-axis machining of the workpieces, whereby the processing program in the control is adjusted to the actual position of the workpiece on the machine table. „This has helped a lot concerning set-up times,“ Gert Pistol is happy to report.
Measuring on the machine does not make us cheaper, but we have become more accurate, reliable and faster.
Since 2005, Pistol has also been using its own pallet clamping system that further reduces set-up times and enables fast operating cycles. „The next shift takes the workpiece off the shelf on its pallet and continues working. This is not a problem if the measurement log is available or if a quick measurement can be made on the machine.“
Tool manufacturing is the most time-consuming step in the process chain leading up to the sample cast. Even when it comes to injection moulds for investment foundries, it is more and more short delivery times for tool manufacturing which matter. Accordingly, zero-point clamping systems and process-reliable operating procedures are essential.
Today, Pistol can achieve manufacturing lead times of about 4 to 6 weeks for a form. This is all the more impressive if you know that Pistol forms can have 20, 30 or even 100 loose parts and sometimes 6 or 8 slides. Everything has to be right from the beginning, so that the customer‘s requirements concerning the accuracy of the subsequent finished products can be met. „In turbine manufacturing, the blade thicknesses must be equal to the hundredth part, and that is the case for all blades,“ says Gert Pistol. „The measurements allow a very high repeat accuracy“On the question of whether the „unproductive“ measuring time does not tend to impede the operation and extend the production time, Gert Pistol gives us a Calibration and measurement with 3D Form Inspect ensures reliable and repeatable measurement results even during clamping in the machine.
On the question of whether the „unproductive“ measuring time does not tend to impede the operation and extend the production time, Gert Pistol gives us a resounding no. „The measurement time hardly matters since incorrect parts cost far more time and effort. In addition, there are multiple advantages due to the possibility of measuring parts and machined surfac-es within a few minutes at any time. This affects the accuracy of the production. We can now deliver bet-ter quality.“ This is a unique feature of the specialist company that is appreciated by the customers. This is communicated to the customer accordingly.
Measuring is a part of daily operations at Pistol. „If an employee should forget to generate a measurement program, this leads to a machine stoppage,“ says Gert Pistol. Any necessary changes can always be measured into existing tools. „These days, when it comes to changes, every shot is a hit,“ Gert Pistol is pleased to say. The slow processing towards the finished size is a thing of the past. With Best Fit, premilled parts can be clamped and quickly measured based on the contour. This reduces set-up times and allows a significantly more accurate machining of parts.


