Power 3 precision thanks to the Hexagon Metrology retrofit
Lufkin - France
Contact us

Founded in 1902, LUFKIN Industries has been specialised in gearing for industrial applications for more than 80 years. Its global reputation as a manufacturer of highly reliable material is completed by its customer service long-renowned for being quick and efficient. LUFKIN France incorporated the group in 2009 and established itself as a builder of gearing transmission organs for a wide range of industrial applications: coal and steel industry, metallurgy, paper mills, cement works, rubber factories, maintenance equipment, refrigeration, petrochemical industry, energy production, oil drilling, pilot plants, etc.
Manufacturing and control methods play an essential role and enable LUFKIN to build reduction units capable of attaining powers of 60 000 kW, rotation speeds of 60 000 t/mn (180 m/s) and torque of 100 000 MdaN. In order to obtain this level of performance, LUFKIN has high precision machining, trimming and gear grinding materials. However, LUFKIN has also made major investments in monitoring equipment to verify the top quality of the products manufactured.
 In 1997, the company decided to invest in a 3D measuring machine to validate its components so it no longer had to only base itself on the quality of the boring machine, to reduce the number of returns and subcontracting work and also to meet the requests from increasingly demanding customers in terms of quality control.
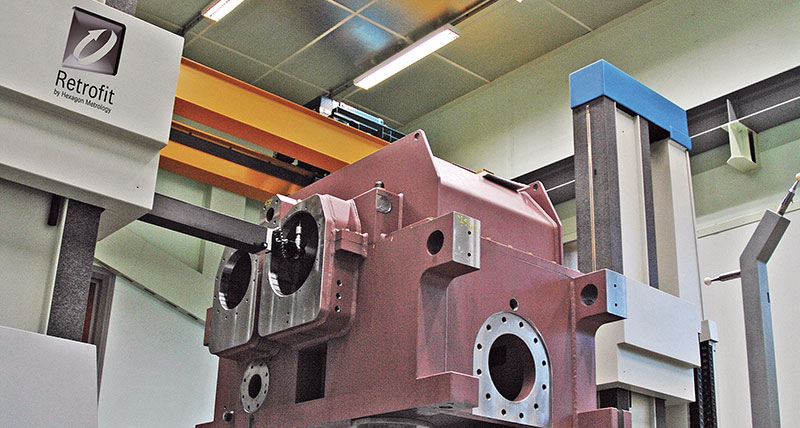
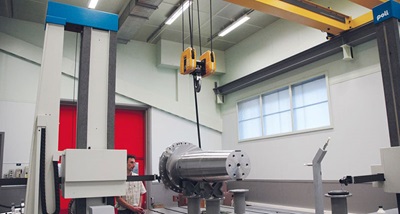
The specifications included very tight machine tolerance in accordance with the CMMA regulation. The tolerance of the first machine acquired, a horizontal measuring arm, was quickly found to have little margin for error. A second arm was then improved technically, in particular with a pneumatic counterweight, a wider granite marble worktop, a training system with a smooth metallic bar with roller (and no longer rackand-pinion) a large floating slab and local air conditioning in the measuring room.
Inspection was then made permanent: for components for direct customers, subcontracting, end customers, components in the process of manufacturing but also, in general, in the context of overall quality control, especially for high speed and nuclear projects. Three-dimensional coordinate measuring machines work in dual and their spatial capability covers 20 m3 to measure components weighing up to 10 tonnes.
In 2010 LUFKIN decided to modify its measuring methods for four main reasons:
- Longer duration arms
- To replace the electronics (electronic command became obsolete and required more spare parts from the supplier who is no longer needed)
- Update the computer systems which had become out of date
- Meet a specific need for more precision and wish to move to a numerical order system
“We set up an investment dossier with our parent company in the United States. Such a dossier must include three offers in addition to an argument to select the favourite company. We put Hexagon Metrology at the top in light of the technical seriousness of their expertise before commissioning the offer and duration of the company after our bad experience with our first supplier” recalls Jean-Yves Grosjean, quality manager of LUFKIN France.
Hexagon Metrology knows this well, the expertise before selling a service is essential in order to propose the best offer possible, adapted to the customer’s actual needs. This is even more important for an “out of group” machine.
“Furthermore, we also have the facilities to assess future problems that may arise and resolve them as soon as possible, analyse grit on the marble (which may entail damaged rails) and assess the age of the machine. If the engines are no longer available or the adaptations too numerous to carry out, we always advise purchasing a new machine. Comparing the final assessment of a retrofit with the acquisition of a new 3D measuring machine is part of the expertise we offer” points out Xavier Calin, retrofit sales manager at Hexagon Metrology SAS.
 By winning the project, the 3D measuring machine manufacturer and retrofit expert responds to a real challenge and technological prowess. An electronics engineer and a mechanical and geometry specialist are paired up for the task. The first stage consisted of implementing a compensation matrix. This performs computerised correction of the machine’s mechanical defects at a 100 mm interval, refined with the help of a laser and special software to compensate the accuracy, rotations and straightness over the 3 axes. It was also necessary to redo the wiring in addition to all the machine’s connections to be able to digitise them. The implementation of the actual speed for the theoretical speed in addition to the alignment quality guarantee of the two frames represented major operation difficulties. Combining both machines by adding together two matrices to measure in twin-arm mode represents a real technical challenge, bravely overcome by the Hexagon Metrology team.
The implantation of the software represented a key stage in the retrofit of the LUFKIN company arms. Sébastien Claudel, a programmer/controller, was already somewhat familiar with PC-DMIS as for other 3D control software on the market but had never had the opportunity to “really” use them. He pointed out “I knew that PC-DMIS offered several possibilities and was very high-performing but I had doubts over its user-friendliness. This doubt vanished after a demonstration in the Paris precision centre where we were able to understand the real advantages of the software in relation to our needs: faciltated integration and better management of the twin arm as an exclusive argument of Hexagon Metrology to propose a single PC to control the two arms.” LUFKIN has also benefited from 5 days of on-site training for different modules. The retrofit offer also included delivery of the office, in addition to the PC, an all-inclusive “key in hand” service from Hexagon Metrology.
The very meticulous and methodical final receipt - machine by machine, according to regulation ISO 10360-2 + in twin-arm mode, controlled by delivery notes – of the retrofit is a guarantor of Hexagon Metrology’s quality service. The precision obtained today is virtually identical to a new machine with the group’s same capacity.
“If LUFKIN had not carried out this retrofit, the measuring method would have become obsolete! The retrofit became necessary to make the machine last longer but it also had to do with company performance” Sebastien Claudel and Xavier Calin proudly recalls.
“The retrofit went very well, concluded J.-Y. Grosjean who pointed out: “The entire LUFKIN team is proud of their measuring centre today. During customer visits or audits, it’s a tool that we systematically present to highlight our quality level."