Measuring for clear vision
Cosmac - Italy
Contact us

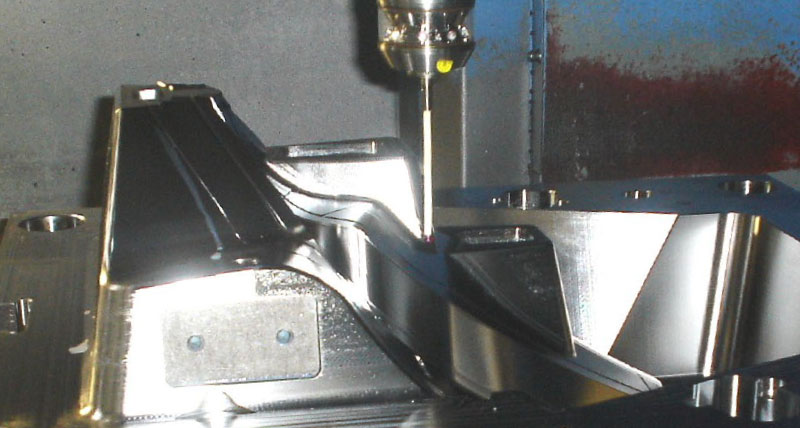
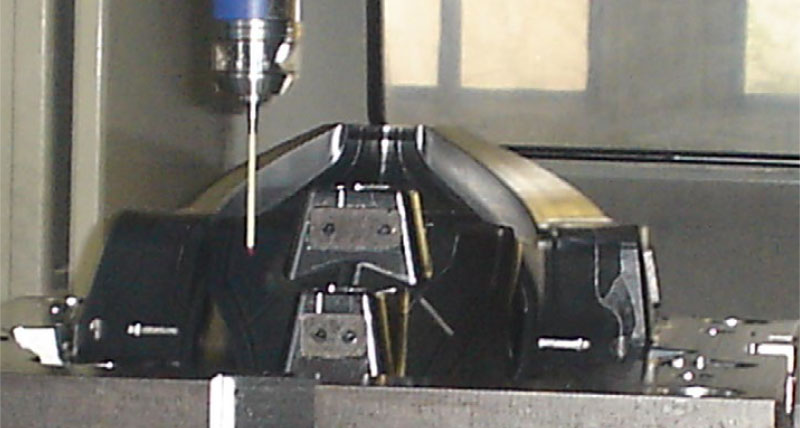
An Italian manufacturer of injection moulds provides for clear vision in production through measuring workpieces while still clamped on the machining centres. This is achieved by using German m&h touch probes and software on Japanese machine tools.
Meanwhile measuring on the machine tool has become state-of-the-art, since it saves time and enables immediate mechanical reworking in one clamping. However, there are many more effects beyond it depending on the company and its conditions in case of application.
For this technology, manufacturers all over the world resort to touch probes and software from the German manufacturer m&h. A visit at the mould design and construction company Cosmac, using m&h software 3D Form Inspect and m&h touch probes on MAZAK and YASDA machine tools, does not only show the international dimension but also proves trouble-free operation of the German system when used jointly with Asian machine tools and controls..
 The Italian mould maker achieves clear vision in the truest sense of the word because they mainly manufacture moulds for sports and leisure glasses, being as well, operating in automotive, electronics and electro-appliance, always with complex parts and high aesthetic requirements. Besides contour accuracy for proper fit, the crucial point is absolutely constant material thickness of the injection-moulded parts. The modern manufacturer of complex moulds with free-form surfaces and many slides, having been founded as recently as in this century, is situated in a narrow valley surrounded by mountains in the Alps. Cutting is done on several MAZAK machining centres as well as a YASDA precision machining centre. All of them are equipped with m&h touch probes and capable of measuring workpieces while still clamped on the machine. In addition, the company uses spark erosion machine tools manufactured by Charmilles and Ingersoll. They manufacture medium-sized mould superstructures up to a weight of 10.000 kg. These are mostly complex moulds for polyamides and ABS-, PMMA and PC-plastics with multiple curved, three-dimensional surfaces. An increasing number of moulds for injection moulding with two different materials are produced.
While having used customary touch probes with electrical contacts for set-up of workpieces at that time, the increasing complexity of workpieces and ever closer tolerances required the option of measuring moulds and inserts. “First of all, we aimed at considerably shortening the time needed for finishing,” Alessandro Maccagnan tells, one of the two brothers managing the young and ambitious company. More than one year ago, both of them proved their clear vision when deciding on the comparably favourable retrofitting of their machining centres with m&h touch probes and the testing software 3D Form Inspect instead of purchasing a measuring machine. 3D Form Inspect from m&h enables testing of workpieces while still clamped on the machine. Thanks to an integrated, patented calibration strategy, the determined measuring results are adjusted by thermal and kinematic deviations of the machines, show reliable repeatability at any time, and are comparable with the results determined by a measuring machine.
Moreover, Cosmac was enabled to rework workpieces immediately and without loss in accuracy caused by a second clamping. Finally, it is not only difficult to take in again and machine a component after having been measured on a measuring machine, it also takes costly time. Quite often, the available close manufacturing tolerance is absorbed even if just because of the almost inevitable offset caused by additional clamping. At Cosmac, the touch probes were attached to the existing machines type MAZAK FJV250, MAZAK FJD50/80 with Mazatrol controls and YASDA YBM950 with FANUC controls by the local Italian m&h service. The m&h software 3D Form Inspect was installed on some computers in the work- shop, each one close to the machine-tool, directly linked and set for the CNCcontrol of the machine itself. The machine operators have been trained for using the software within one day on the spot, using their own workpieces and machines. Operation is described as being very simple. All machine operators like the system and use it frequently. In the meantime, their colleagues called for similar possibilities to be used on the eroding machines.
“All our wishes and expectations have come true,” Stefano and Alessandro Maccagnan confirm in unison. Problem-causing machining areas at the moulds could be significantly reduced. The total machining times related to a complex mould were shortened, since reworking and new manufacturing of mould parts could be avoided. In the past, time and again errors were only detected during assembly of the moulds; parts did not match and had to be manufactured once again. “Today this is no longer necessary.” Because everything is machined to size and checked. If top and bottom parts are manufactured on the same machine and are measured and checked with m&h, this can be considered a closed loop.
The parts perfectly match with each other. “Sometimes we can leave a fault in one half of the mould as it is and simply machine the counterpart accordingly, which saves a lot of money compared with reworking or new machining,” Alessandro Maccagnan describes a welcome side effect. In many cases, also diespotting can be shortened to a large extent, since all parts fit much better. Quite often, the parts only have to be polished a little bit. “With single moulds we have saved 50% of the fitting time compared with previous working methods. It’s not always as much as that, however, we save an average of 15 to 20%,” Alessandro Maccagnan describes the achieved success.
“Moreover, we are now able to document our quality immediately and take the workpiece off the machine together with a measuring protocol,” Stefano Maccagnan adds. “The customers accept the m&h protocols, and this facilitates our work decisively.“ Some customers executed a countercheck and considered the protocols generated by m&h to be good.
We have completely eliminated non- productive machining
The detected deviations versus control measurements on the measuring machine were in the μ-range. “Sometimes the machine tool even comes closer to the truth. Time needed for measuring on the machine is negligible in relation to the total machining time,” Stefano Maccagnan states. Alessandro Maccagnan adds: “Measuring takes maybe four minutes. But then we have to think it over 15 minutes what might be the reason for the deviation and what can be done. However, we achieve safety across the entire manufacturing process and know the time needed for manufacturing.” Cosmac expressly includes measuring with m&h on the machine as part of the scheduled manufacturing time in their working plans, which often are sent to the customer. They are glad to report that this has, in some cases, been decisive for receiving the order.
Beyond these effects, measuring on the machine even enabled clear vision in quite a different respect. “We’ve got a completely new view of machining and behaviour of tools during the operating procedure,” Stefano reports. “Now we understand the cutting process much better.” Conclusions regarding tools used and milling strategies could be drawn instantaneously right from the detected deviations at the workpieces. In one case it became obvious that dimensional deviations of surfaces were caused by the fact that the cherry used didn’t show a real spherical shape. In the meantime tools have been selected and other tools are used than in the past, partly in combination with other milling strategies.
All in all, at Cosmac there are no surprises and uncertainties any more the field of metal-cutting that previously postponed delivery dates. Right from the beginning of order processing, the manufacturing time needed is clearly determined and can be adhered to. “We have completely eliminated non-productive machining,” Alessandro Maccagnan gladly reports. The two brothers answer the question whether they would invest in m&h touch probes and testing software again in unison: "Straight away Again "
