Economical quality for all
Geberit - Switzerland
Contact us

By implementing a server licence for their m&h measuring software, Geberit has standardised the software of three plants in two countries. This has made the same functions available to all the people involved. The objective was to harmonise manufacturing equipment throughout all plants, make better use of licences within the group and reduce upkeep and maintenance expenses.
Geberit is the European market leader in sanitary technology and widely known for its cisterns and actuator plates. The company headquarters is situated in Rapperswil-Jona on Lake Zurich, where the majority of product development also takes place. Production is made in 15 specialised plants in Europe, Asia and North America. The three most important production facilities have their own tool making departments and have acted independently on work and investment so far.
Striving for a consistent IT infrastructure within the group, the usual dilemma of compability between a variety of systems and versions of software was experienced. It was also noted that the mould making plants in Jona, Langenfeld/ Germany and in Pfullendorf were using touch probes and 3D Form Inspect software from m&h. All locations used different modules and software versions and all had their own software maintenance contract.
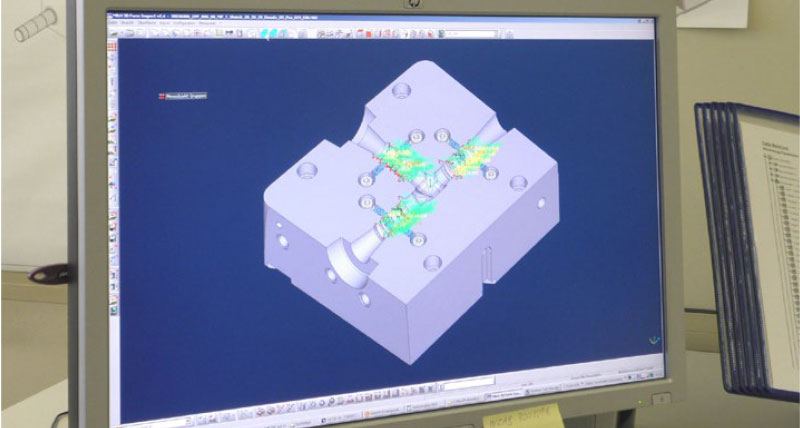
 At Geberit, m&h’s highly praised software and hardware are in daytoday use and vital for enhanced quality with smooth running production. Software has now been brought to the same level on all sites. “The objective was to harmonise the software environment in all business units,” says Jürg Huber, the manager of all CAX services at Geberit. “Now we have concluded a uniform, centralised contract with m&h with the facilities working with local clients, but getting the licence from a central server in Rapperswil-Jona.” The new licence system does not cause any time delay. This has been made possible by having the latest m&h software version made available as a server version to comply with a frequent customer request. With the server version of the 3D Form Inspect software, licence management is executed in a centralised way. Responsibility for establishment and administration of measuring data plus data management is undertaken by the facilities and executed in a decentralised way. This means the company becomes more flexible and economical since no unnecessary licences need to be purchased. As soon as a user logs off the software, the released licence can be used from another workplace in any of the factories.
As a prerequisite this means that m&h touch probes and software must work on any machine with any commercially available control system. Moreover, the software must be available in many languages. In practice, the work environments of international companies are usually not homogeneous but multifaceted in many ways. The three Geberit plants in this report use machines from a variety of different suppliers, i.e. DMG, Hermle and Mikron. As well as Heidenhain controls, Millplus is also in use. m&h’s software is universal and works on controls from Siemens, Fanuc, Fidia, Andron plus many others.
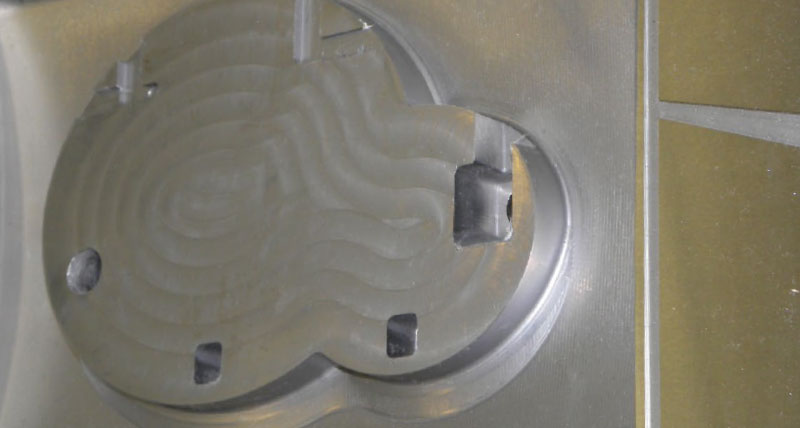
While the Geberit plant in Langenfeld mainly manufactures dies for metal forming, the tool making unit in Pfullendorf produces moulds for sanitary systems such as actuator plates and val- ves. The tool making facility in Jona is geared to manufacture tools for the production of moulded parts for piping systems plus actuator plates. These are very different requirements but all facilities had independently decided to use m&h. After harmonisation was completed all facilities could use all software modules that had been purchased to date thus extending the application possibilities of all sites.
This now means that the module “Best Fit” can be used in Jona to significantly reduce set-up times and enhance precision. This module measures a workpiece contour at predefined points to determine the actual position of the workpiece. Subsequently zero points and alignment of the machining program are adjusted to the actual position in the control. This is particularly important when pre-milled moulded parts are set up again and finished such as after hardening. By measuring the contour, any deformation caused by hardening is simultaneously detected and included in the calculation. Also in the case of repair work, the setting up of moulds is speeded up considerably. Milling depth and machining times are minimised and “air cutting” is eliminated.
So far only finished workpieces have been checked, while still clamped on the machine, with m&h 3D Form Inspect software at Geberit mould making in Jona. The programs needed were developed in the job preparation department. “Measuring with m&h saves a huge amount of time,” says Daniel Wilhelm, head of job preparation at the Geberit toolmaking facility. “In the past we have milled, eroded and measured by hand, often with specially manufactured measuring devices. In 50 percent of all cases we have had to take the parts back to the machine again,” as he describes the previous scenario. “Today, we can save up to three days per cavity!”
In the tool making facility, an area that has been partly air-conditioned, they now try to avoid eroding whenever possible and do all workpiece finishing using HSC technology. Checking the workpieces with m&h while still clamped, significantly contributes to time savings and more precise working. Next a computer will be installed in the workshop to enable operators to make quick measurements between operations. The m&h software requires just a few mouse clicks to automatically generate a measuring program. This program can be quickly called at the respective machine and executed to give a target/actual comparison of the workpiece in a few minutes. The German Gerberit plants have reported good results this way.
“We’ve noted positive aspects from the very beginning,” describes Daniel Wilhelm. After finding a solution for adapting the CATIA software to the CAD system being used at Geberit, it runs problemfree. Now more and more possibilities are being explored at Jona too. “The new measuring function for tapered surfaces is impressive,” Daniel Wilhelm enthuses.
Geberit is the European market leader in sanitary technology and widely known for its cisterns and actuator plates. The company headquarters is situated in Rapperswil-Jona on Lake Zurich, where the majority of product development also takes place. Production is made in 15 specialised plants in Europe, Asia and North America. The three most important production facilities have their own tool making departments and have acted independently on work and investment so far.
Striving for a consistent IT infrastructure within the group, the usual dilemma of compability between a variety of systems and versions of software was experienced. It was also noted that the mould making plants in Jona, Langenfeld/ Germany and in Pfullendorf were using touch probes and 3D Form Inspect software from m&h. All locations used different modules and software versions and all had their own software maintenance contract.
 At Geberit, m&h’s highly praised software and hardware are in daytoday use and vital for enhanced quality with smooth running production. Software has now been brought to the same level on all sites. “The objective was to harmonise the software environment in all business units,” says Jürg Huber, the manager of all CAX services at Geberit. “Now we have concluded a uniform, centralised contract with m&h with the facilities working with local clients, but getting the licence from a central server in Rapperswil-Jona.” The new licence system does not cause any time delay. This has been made possible by having the latest m&h software version made available as a server version to comply with a frequent customer request. With the server version of the 3D Form Inspect software, licence management is executed in a centralised way. Responsibility for establishment and administration of measuring data plus data management is undertaken by the facilities and executed in a decentralised way. This means the company becomes more flexible and economical since no unnecessary licences need to be purchased. As soon as a user logs off the software, the released licence can be used from another workplace in any of the factories.
As a prerequisite this means that m&h touch probes and software must work on any machine with any commercially available control system. Moreover, the software must be available in many languages. In practice, the work environments of international companies are usually not homogeneous but multifaceted in many ways. The three Geberit plants in this report use machines from a variety of different suppliers, i.e. DMG, Hermle and Mikron. As well as Heidenhain controls, Millplus is also in use. m&h’s software is universal and works on controls from Siemens, Fanuc, Fidia, Andron plus many others.
While the Geberit plant in Langenfeld mainly manufactures dies for metal forming, the tool making unit in Pfullendorf produces moulds for sanitary systems such as actuator plates and val- ves. The tool making facility in Jona is geared to manufacture tools for the production of moulded parts for piping systems plus actuator plates. These are very different requirements but all facilities had independently decided to use m&h. After harmonisation was completed all facilities could use all software modules that had been purchased to date thus extending the application possibilities of all sites.
This now means that the module “Best Fit” can be used in Jona to significantly reduce set-up times and enhance precision. This module measures a workpiece contour at predefined points to determine the actual position of the workpiece. Subsequently zero points and alignment of the machining program are adjusted to the actual position in the control. This is particularly important when pre-milled moulded parts are set up again and finished such as after hardening. By measuring the contour, any deformation caused by hardening is simultaneously detected and included in the calculation. Also in the case of repair work, the setting up of moulds is speeded up considerably. Milling depth and machining times are minimised and “air cutting” is eliminated.
So far only finished workpieces have been checked, while still clamped on the machine, with m&h 3D Form Inspect software at Geberit mould making in Jona. The programs needed were developed in the job preparation department. “Measuring with m&h saves a huge amount of time,” says Daniel Wilhelm, head of job preparation at the Geberit toolmaking facility. “In the past we have milled, eroded and measured by hand, often with specially manufactured measuring devices. In 50 percent of all cases we have had to take the parts back to the machine again,” as he describes the previous scenario. “Today, we can save up to three days per cavity!”
In the tool making facility, an area that has been partly air-conditioned, they now try to avoid eroding whenever possible and do all workpiece finishing using HSC technology. Checking the workpieces with m&h while still clamped, significantly contributes to time savings and more precise working. Next a computer will be installed in the workshop to enable operators to make quick measurements between operations. The m&h software requires just a few mouse clicks to automatically generate a measuring program. This program can be quickly called at the respective machine and executed to give a target/actual comparison of the workpiece in a few minutes. The German Gerberit plants have reported good results this way.
“We’ve noted positive aspects from the very beginning,” describes Daniel Wilhelm. After finding a solution for adapting the CATIA software to the CAD system being used at Geberit, it runs problemfree. Now more and more possibilities are being explored at Jona too. “The new measuring function for tapered surfaces is impressive,” Daniel Wilhelm enthuses.

