Calibrating in the Premier League
Robert Bosch GmbH - Germany.
Contact us

Robert Bosch‘s central calibration laboratory is a byword for the highest precision and competence in metrology. Whereas other laboratories come up against limits set by the accuracy of their metrology, that‘s not the end of the line in the central calibration laboratory at Robert Bosch : "We are called upon to measure highly complex parts,“ says DKD laboratory manager Rogér Ernst. "This also applies when it comes to measuring innovative products developed by the Bosch Group. We carry out correlation measurements in cases of doubt." The laboratory technicians are also responsible for creating metrology standardisation and guidance documents for use throughout the whole of the Bosch Group. Working with measuring machine manufacturers, the team is committed to the advancement of metrology.
Calibration - signed, sealed, delivered
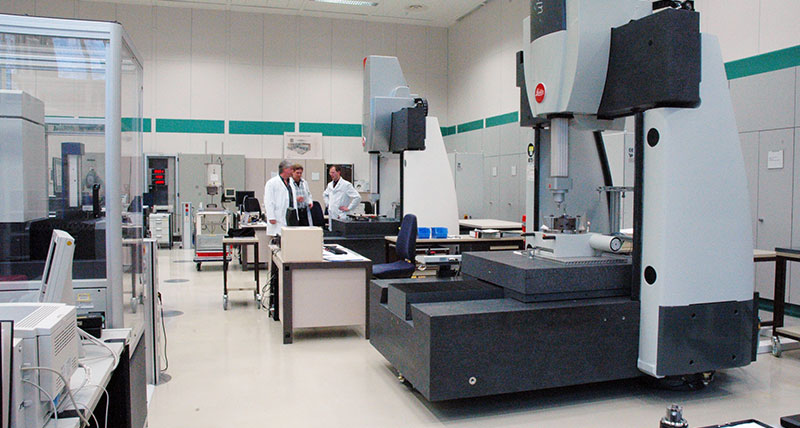
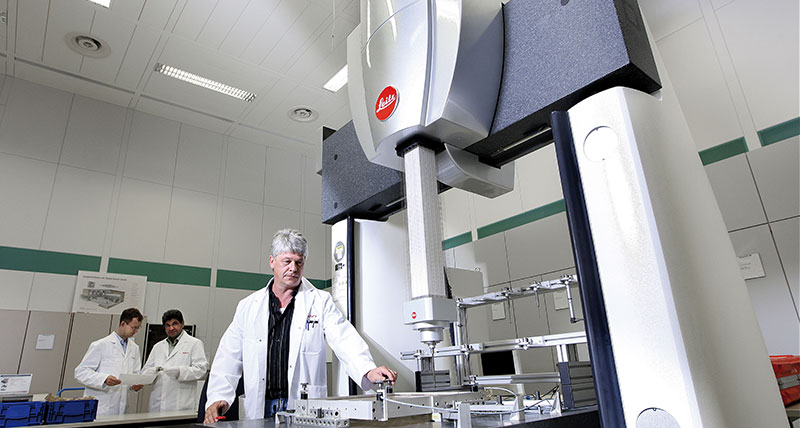
 A further service provided by the showcase laboratory on the "Schillerhöhe" above Gerlingen: the calibration and testing of measurement and test equipment. The Leitz PMM-C Infinity in the laboratory is accredited by the DKD for the calibration of ball plates. The ball plates are used to test volumetric length measurement uncertainty, probing uncertainty and orthogonality of the measurement axis of coordinate measuring machines.
The metrology technicians are expert at calibrating thread gauges, spline gauges and test cylinders using the Leitz PMM-C Infinity and the Leitz PMM-C Ultra. In addition to the manufacturing and research centres operated worldwide by the Bosch Group, the central calibration laboratory counts third-party companies among its circle of customers. The laboratory also markets its calibration services on the Internet at www.BOSCH-Kalibrierdienst.de.
Perfect conditions
The range of services offered by Bosch‘s central calibration laboratory has attracted widespread attention. A tour of the laboratory cannot fail to impress. With a floor area of 300 square metres, the laboratory has enough space for a wide range of machines for measuring shape, position and surface characteristics. The equipment reflects the high quality associated with the Bosch name. The temperature in the laboratory is also ideal: a constant 20 °C with fluctuations not exceeding 0.1 °C. The laboratory is buried up to half its depth underground to shield it from environmental influences. The immediate vicinity is clear of manufacturing facilities that could cause vibrations.0.33 Micron measurement uncertainty
The Leitz PMM-C Infinity impresses with a measurement uncertainty of 0.33 µm + 0.94 • 10-6 • L for the calibration of ball plates and a sophisticated concept that forms the basis for very low levels of measurement uncertainty, incorporating features such as scales with a resolution of 4 nanometres and active pneumatic damping. With an absolute instinct for coordinate measuring machines and years of experience, Bosch technicians have all the skills necessary to exploit the full potential of the Leitz PMM-C Infinity.Their diligence is rewarded with the smallest measurement uncertainty in its measurement tasks. The measurement uncertainty can be calculated for each individually measured calibration feature and listed in the results log. The main laboratory uses the "Virtual CMM" method, in which simulations to calculate the measurement uncertainty are run under the measuring software QUINDOS. The "Virtual CMM can produce measurement uncertainties in the calibration of adjusting pieces, in some cases even better than the DKD accredited values. "With the Leitz PMM, which we used previously for these tasks, this was possible only with great deal of effort," says Klaus Zürn, second-in-charge at the central DKD calibration laboratory at Bosch.
Closing the circle
 The calibration of ball plates takes several hours because of the high accuracy demanded. From the beginning, the technicians work closely with the Physikalisch Technische Bundesanstalt (PTB), the highest metrology authority in Germany, to ensure traceability to national standards. A special test piece is measured with the Leitz PMM-C Infinity and correlated with the national standard for length at the PTB.
This series of test measurements allows the length measurement deviation of the Leitz PMM-C Infinity to be determined. Then the metrology technicians place the ball plate in position and measure it in different settings. Temperature measurements before, during and after the measurement of the ball plate are essential for the accuracy of the results and are taken into account in the calculation of the length measurement deviation. At the end of this process, in addition to a detailed calibration report, the customer receives the ball plate, which he can then use to check his measuring machine. He has the advantage of an accurate assessment of the geometric deviation of his coordinate measuring machine referenced to international length standards.
Huge range of parts demands flexible metrology
Another highly capable measuring machine in the central laboratory is the Leitz PMM-C, which boasts a measurement uncertainty of 0.4 µm + 10-6 • L. The Leitz PMM-C Ultra and the Leitz PMM-C Infinity have to cope with a huge range of parts and features. For Bosch is involved in all sorts of industries. The automobile industry relies on the company‘s innovations. Building technical services, domestic appliances, electrical power tools and packaging solutions are marketed under the famous red label. This means the central calibration laboratory must provide a flexible and accurate metrology service. In addition measuring components – for example, gears or injection pump parts – the technicians also have to measure master parts. Tolerances down to 2 microns are the order of the day, for example when measuring gear teeth destined for use in many different applications.Free choice with QUINDOS
Both Leitz coordinate measuring machines are therefore equipped with numerous QUINDOS metrology software options. For example, the available options include curve measurement, statistics, measurement of parts on pallets, gears, gears with unknown parameters, helical bevel gears, threads, camshafts etc.
"The flexibility and the ability to measure highly complex parts are the highlights for us," says Rogér Ernst. "We create a measuring program based on the drawings and specified features for every part we receive from our internal and external customers. If necessary, we optimise the measurement strategy to ensure that it is also practical for inspecting series production components. The scope of products and range of precision requirements are immense. To cope with this, we need reliable and precise metrology." Bosch is on the right track with Leitz cutting-edge technology.