Smart solutions for effective railway inspection
Engineering Reality magazine - 2023 Volume 1

Engineering Reality 2023 volume 1 edition
Putting data to work
Railways are complex mechanical and electrical systems with hundreds of thousands of moving parts. The rail industry is increasingly turning to high-tech measurement to analyse production quality, infrastructure, and in-field maintenance, with the goal of uncompromising passenger safety and comfort.
Inspecting rail tracks for flaws that could lead to catastrophic failures is essential. According to safety analysis performed by railroad administrations, track defects are the second leading cause of accidents on railways worldwide. Not surprisingly, the leading cause of railway accidents is still human error, and the contribution of poor management decisions to rail accidents caused by infrequent or inadequate rail inspection is significant.
Every year railroads spend millions of dollars to inspect the rails for internal and external flaws, including track failures and derailments. Integrating advanced inspection technology during manufacturing and ongoing maintenance is fundamental for the future of safe and efficient rail travel.
Inspection plays a crucial role in optimising performance. It is more than checking the final product; metrology must live throughout the production process. Every area of the railway production process has a high potential for productivity gains by introducing improved inspection methods.
Railway infrastructure
Railway line construction projects are capital intensive, and once in place, it is difficult to change the alignment of these rail tracks. Alignment and profile checks during track installation are therefore paramount to safe operation. Further, track alignment must be regularly checked throughout the rail lifecycle as part of the preventative maintenance process.
Several techniques are used for rail track alignment inspection for straight paths, curved paths, levels, and gradients, and each requires specific inspection equipment. The equipment needs to perform a horizontal alignment to define the track’s XY-plane and then a vertical alignment to establish the elevation or Z-plane. This application demands portable devices that can be operated directly on the track, with options including 2D laser scanning systems, portable measuring arms or laser trackers with handheld or direct scanning capabilities.
 Elastic rail clips (E-clip) provide durable alignment, which protects the steel rail and the fastenings from the high pressures a train passes over the track. A complete fastening system generally comprises two elastic rail clips, two rail shoulders, one rail pad and two rail insulators.
Inspection of E-clip systems can require a portable system for on-site measurements, such as a portable measuring arm, or a high-volume system suited to measurement in a forging environment, such as a dedicated tube inspection cell offering direct bending machine feedback.
Railway transportation requires rails to conform strictly to safety requirements specified in various government regulations. Dedicated gauge track geometry and rail wear profile measurement devices are ideal for this process. Rail dimensional inspection uses such gauges for:
- Fast, flexible, and precise evaluation of track gauge, superelevation, and rail track
- Direct calculation of the twist to detect irregularities on site and initiate necessary maintenance tasks directly
- Accurate measurement of the entire rail head cross-section and calculation of critical non-dimensional quantities and wear parameters in a matter of seconds
Chassis and bogie
A bogie (truck) frame is a chassis structure serving as a modular sub-assembly of wheels and axles to provide vibration dampening against the shocks transmitted from the track during motion. A bogie usually remains attached to a railway carriage or locomotive and is used to provide traction and braking. Bogies carry the railcar load on the tracks, and any mis-alignment, wear or damage is costly to repair.Identifying problems on bogie components before they fail can reduce costs significantly. After manufacturing, assembly or maintenance, the frame requires inspection for geometrical validation. Regular quality inspection and adjustment of the wheel loads and the bogie geometry optimises travel comfort and minimises rail and rolling stock wear and operating costs.
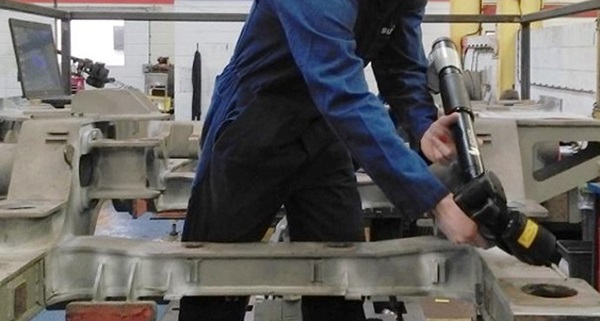
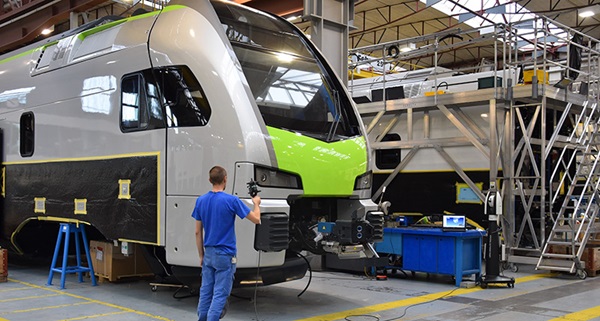 Chassis and bogie inspection can be performed by a range of manually operated measurement devices, requiring large inspection volume, hidden point coverage, portability and shop-floor readiness, and immediate access to results for on-the-spot alignment corrections. The best options for such an application are a laser tracker with a handheld wireless touch probe, a large-volume portable measuring arm or a single-camera photogrammetry system.
Chassis and bogie inspection, including the geometrical analysis, optimisation, and adjustment of wheel loads, is a prime application for improving efficiency by implementing an automated inspection system.
This can be achieved with a laser tracker with a scanner system mounted on a robot and rail and combined with the rotary device, allowing full coverage of the bogie. An alternative option is a large-volume CMM with an open structure for improved loading and programming flexibility.
Wagon and coach
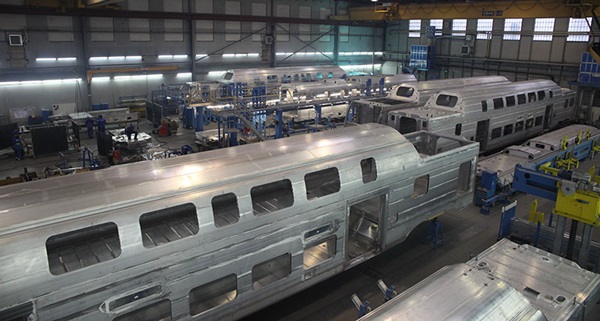
Several manufacturing operations come together in the construction of a rail wagon. Inspection throughout the process typically requires portable inspection technologies that are comfortable and capable of measuring on the shop floor.Checking for locomotive frame alignment requires dimensional inspection and profile gauge analysis following the CAD or inspection plan. It also requires an overall geometrical validation and completeness check of features before the final assembly process. A portable measuring arm with a touch probe is a possible solution. At the same time, a laser tracker with direct scanning capability or a single-camera photogrammetry system offers a large measurement volume.
Welding and assembly fixture adjustment require accurate measurement. Gauging fixtures locate the position in a specific location or orientation and support the components maintaining conformity and interchangeability. Manufacturing tools are initially checked and adjusted according to CAD and are usually periodically inspected at defined time intervals. This can be achieved with touch probe inspection, laser tracker or portable measuring arm.
 Loading gauges define the maximum height and width for railway vehicles and their loads to ensure they can safely pass under bridges and through tunnels and keep trackside buildings and structures clear. This application is ideal for laser tracker measurement, using direct scanning capability or a combination of reflector and probe measurement.
Components’ conformity monitoring during assembly identifies potential defects for re-work. Missing details or features are detected with a CAD comparison or based on a guided inspection plan. A laser tracker with direct scanning capability or a large-volume 3D laser scanner is suitable, as it can be a portable measuring arm with a touch probe for smaller components.
Drill position marking is essential. It involves setting out geometrical features such as borehole centres, lines or contour lines with real-time coordinates and a corresponding punch marker device. A dedicated solution is a laser tracker with a wireless handheld probing device and punch tool marker accessory.
Major railway components
Many other essential components go into the construction of rail stock, demanding various inspection techniques and technology solutions.Axle boxes are one of the most critical components of a railway carriage. The housing of the bearings supports the axle load of the vehicle and directly impacts passenger comfort. Portable measuring arms with laser scanners, structured light scanners, and shop floor CMMs are used to inspect these components.
The integrity of train axles is of great importance to the railway industry. This requires the wheels and other auxiliary axle components to be removed from wagons and locomotives to facilitate access to the inspection area. Therefore, aiming to minimise the interruption of train services and maintain safety, train operators require frequent and regular inspection methods that allow rapid inspection with the least number of dismantling operations. Touch probe measurement, referenced by a portable measuring arm or laser tracker, offers the most convenient solution.
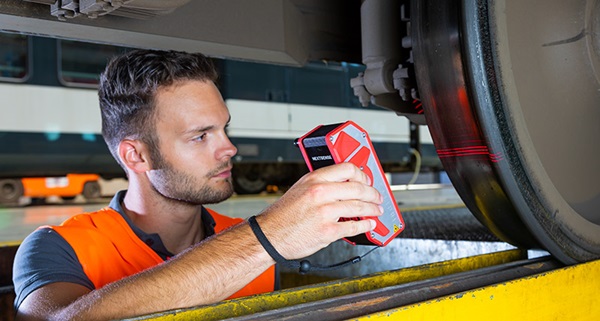 Train wheelsets and rails are typical high-wear parts that significantly influence passenger comfort and safety as well as noise and ride. Profiles of wheels, brake discs, rails and switches must therefore be controlled by recurring measurement operations under demanding operating conditions. Hardware solutions include dedicated profile measurement devices, automated on-track systems and portable measuring arms.
The windshield frame and windscreen must be scanned and modelled before assembly to ensure the aerodynamic design and perform clearance analysis of the windscreen fit to avoid mechanical deflection or collision of windshield glass with the frame. A laser tracker with a touch probe and scanner is a robust solution, as are portable measuring systems with a large-volume surface scanner and a single-camera photogrammetry system.
Wagon tube kits are found everywhere in modern trains, hidden in the roof of passenger cabins, bogies, or in the engine room. Tubes carry air, gas, or hydraulic fluids for brake line systems. After manufacturing, bent tubes are inspected with portable arms with tube probes, laser scanners, and automated tube inspection cells. A dedicated tube inspection system is necessary for wagon tube inspection, whether a turnkey tube inspection cell or a portable measuring arm-based system using a laser scanner or infrared tube probes.
Interior components
Even carriage interiors have components that demand inspection to ensure passenger safety and comfort.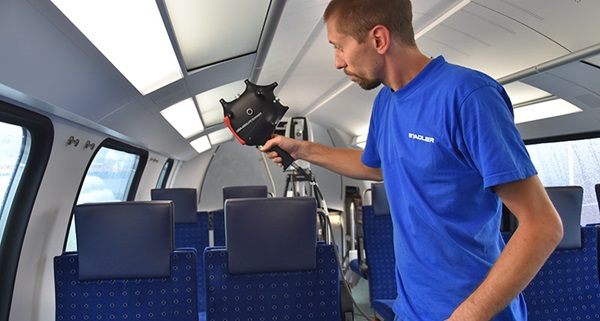 Passenger seating comfort and safety is an essential system in any train as it provides a direct experience for the entirety of the journey. Together with other passenger interfaces like tables and overhead luggage compartments, this is an area where comfort, safety, health, and ergonomics are very important. Laser trackers and portable measuring arms with 3D scanners have the ideal portability and accuracy for these tasks.
Curved tubing is installed in many places in the train interior, including as handrails and brackets or as supports for other components. Often, the necessary holes are drilled by laser cutting in the production process before the tubes are bent. Bending machines must therefore be able to accommodate the tubes in an oriented manner. During measurement, both bending curves and the bores must be checked. This again calls for a dedicated tube inspection system, either using a portable measuring arm or a turnkey tube inspection cell.
Hexagon’s metrology and inspection solutions for railways
Hexagon has dozens of inspection hardware solutions well-suited to the wide range of applications in the rail industry, from CMMs and hand tools to portable measuring arms, laser trackers and structured light scanners, all supported by leading dimensional metrology and CT software. They capture real-world data for positioning and inspection, providing actionable information that continuously improves efficiency, quality, productivity, safety and comfort. They bring many capabilities, including dimensional inspection and analysis, statistical process control and analysis, CT analysis, automated inspection, and robot calibration and simulation.
From entry-level to ultra-high accuracy and shop-floor optimised, Hexagon’s unparalleled CMM range drives quality and productivity for manufacturers. With multiple optical and tactile sensor technologies simultaneously available, OPTIV CMMs provide an all-in-one solution to capture the entire part geometry in a single program. The largest gantry and horizontal arm CMMs offer robust materials, a stable structure and high accuracy, whether on the production floor, in a production cell or the measuring room.
Laser tracker systems lead the field regarding portable coordinate measuring machines’ accuracy, reliability, and durability. Portable measuring arms allow quick and easy measurements directly in manufacturing, where process improvements are the most beneficial. Structured light scanners deliver high-accuracy data capture in an instant. DPA is used for referencing and multi-point tracking as a standalone system or in combination with scanners.
Similarly, industrial 3D laser scanners play a key role in reverse engineering quality assurance and 3D data capture. Dedicated non-contact systems allow for profile measurement and inspection. A comprehensive range of tube and wire measurement systems delivers solutions tailored to various applications in tube production.
Easy-to-deploy operator-assistance systems and modular automation solutions offer a rapid return on investment from automated inspection. Automated inspection cells based on various measurement technologies provide a turnkey approach to high-speed, high-accuracy measurement on the shop floor.
Laser tracker-based robotic measurement and control systems elevate the potential of industrial automation and bring metrology-grade accuracy to smart manufacturing. For the rail industry, in particular, Hexagon also offers automated on-track measurement of wheelsets, multifunctional profile measurement devices and simple condition assessment of the wheelset for predictive maintenance.
PC-DMIS can be the single metrology software solution across the shop floor. Flexible, scalable, powerful, and compatible with all kinds of devices. Whether scanning or probing with a portable arm or using a laser tracker, small or large-scale applications, Inspire and SpatialAnalyzer offer state-of-the-art inspection. REcreate is the reverse engineering software that reduces workflow complexity to create a faster and more flexible design, production, and inspection environment.
The Q-DAS suite and eMMA offer powerful tools to build a trusted and comprehensive quality assurance solution for industrial production applications. VGSTUDIO MAX provides complete material and geometry analysis tools for CT-scanned parts in one software. VGinLINE inspects parts automatically and non-destructively with industrial computed tomography.