SHINE: The innovation that sets Hexagon’s 3D laser scanning solutions ahead
By Mark D’Urso, Product Marketing Manager, and Darren Goh, Business Enablement Manager, Hexagon’s Manufacturing Intelligence division
Engineering Reality 2024 volume 1
Accelerate Smart Manufacturing
How does SHINE make laser scanning a more dependable metrology tool?
Over the past decade, technological improvements have seen 3D laser scanning become an increasingly important and viable alternative to tactile measurement across a wide range of inspection tasks. Modern high-performance 3D laser scanners can now acquire more than a million points in a second, covering an entire object instead of just a few key features and in much less time. The result: an easy-to-understand colour map that compares the acquired point cloud data against the design files.A brief history of 3D laser scanning
The first generation of laser line scanners required the user to manually define and fix the optical exposure settings for the type or colour of material to be measured. For example, a car is grey, but it has some black areas. An early laser line scanner could either scan one or the other surface colour, but never both in one pass.
A second generation of scanners offered automatic exposure, meaning that for every scan line, the scanner would find the best settings automatically, according to the surface colour perceived by the scanner’s camera. However, in this case the entire scan line always needed to be on the same surface colour because every point on the scan line was measured at the same exposure setting. This was certainly an improvement, and with the right series of scanner orientations was a technology that could be helpful, but it was still not perfect.
In the next generation of scanning technology, Hexagon introduced the “flying-dot” scanning concept to the market. Scanners based on flying-dot technology could adjust the exposure setting on every single point along the laser line and therefore scan any material in any orientation. But this technique came with a drawback: the motorisation needed within the scanner to make this type of scanning possible also made it relatively slow.
Today, the laser line scanner market has evolved even further, especially with the introduction of dynamic exposure settings and automatic noise elimination, functions that have allowed great improvements in scanning usability and data quality. The current-generation Absolute Scanner and HP-L-10.10 laser scanner product ranges from Hexagon use a set of optical algorithms known as SHINE technology. This allows for 3D scanning on challenging materials such as chrome, shiny black or multi-colour surfaces with ease, as well as automatically filtering scan data outliers without compromising scanner performance and accuracy.
So far, there are four 3D laser scanners that boast integrated SHINE technology: the Absolute Scanner AS1 and Absolute Scanner AS1-XL, which offer high-definition feature and large surface scanning for Hexagon laser tracker and portable measuring arm systems; and the HP-L-10.10 and HP-L-10.10 Lite, the flagship and O entry-level laser scanners for stationary CMMs.
Why do we need these modern 3D scanners?
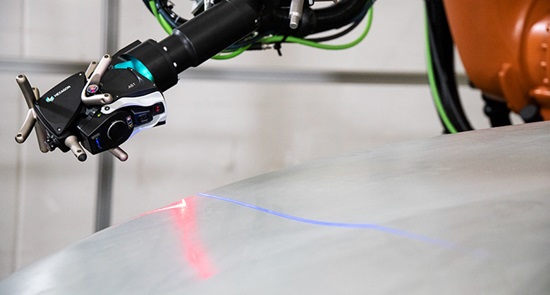 While scanning speed (in terms of points collected per second and per line) has consistently increased over the years since non-contact scanning measurement was first introduced, the accuracies demanded and complexity of measurement surfaces have also become more challenging, as the application of scanning technology has broadened into new areas of manufacturing.
The need to scan different types of surfaces when inspecting manufactured parts is driven by the rapidly increasing demand from manufacturers to use different materials. For example, some may choose to use composites/carbon fibre, as well as different finishing materials, to stay competitive in their industry while simultaneously improving their product’s value proposition. And of course, other conventional surfaces such as plastics and aluminium remain in demand, and are often used alongside new materials and finishes.
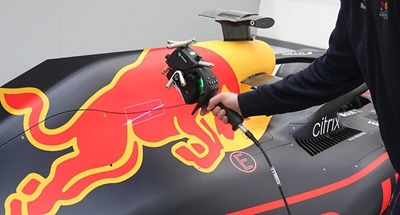
Composite component manufacturing
Carbon composite material is often used in manufacturing for automotive or aerospace, as well as other areas such as sports equipment. This is because of its strength, low weight, resistance, and flexibility. A fast way to inspect a finished carbon surface is by using a laser line scanner. Because the material is dark with a knitted texture, an exposure adjustment would therefore be necessary to adapt to the surface. These materials are also expensive, and so scrap must be reduced to a minimum, meaning measurement needs to be accurate at all times.
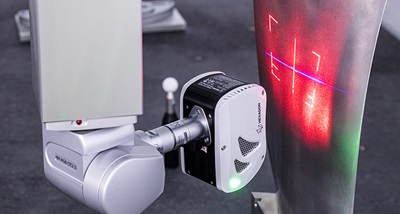
Turbine maintenance
In the maintenance, repair and overhaul (MRO) area of gas or steam turbines, the reworking of the turbine blades is common as they are exposed to pressures such as propulsive forces. After the blade polishing process, a quick way to inspect the reworked blades is to create a 3D scan and compare with the master CAD.Because of the shiny surface of the blade and the curvature of the leading and trailing edges, a correct exposure setting for the laser scanner is needed to avoid the risk of outliers on the edges.
Automotive interiors and exteriors manufacturing
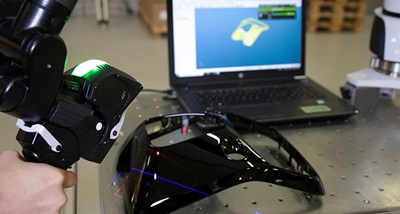
Car interior panels, wing mirrors and bumpers typically have dark glossy trimlines around the surface or sometimes over the surface. One of the reasons for using this dark glossy material is to bring a more elegant look to the panels, which goes hand-in-hand with the increased perception of quality caused by how much flush and gap requirements have tightened in automotive interiors over the past 10 years.Having to inspect and scan these surfaces requires a very high laser line intensity and correct camera exposure; if the laser intensity is too high, it can cause outliers around the scan data.
Finding the right balance
With typical laser scanners, a measurement session would begin with the operator needing to choose appropriate settings for the part’s surface. Is the surface pale or dark? Is it shiny or matte? Is it rough or smooth? This complexity can cause different operators to interpret the scanner settings in different ways, causing variability in the scan data and introducing room for errors.The table in Figure 1 shows the relationship between the part’s surface darkness and the scanner’s optical settings. As a surface becomes darker, the exposure time of the scanner’s camera (here shown as “Exp time”) must be increased to be more sensitive to incoming light, because a dark surface returns less laser light to the scanner’s sensor. The operator should therefore move the cursor to the right to a higher percentage value in order to scan the part correctly. However, this increase also raises the risk of spurious data — noise — appearing in the scan. This might result in a smooth part appearing rough in the scan, or give the scan an incorrect shape. Equally, if the settings are too low, there might be areas of missing information.
As you can see, it is often difficult to find the correct combination of settings that will allow the part to be measured in the most effective and accurate way possible.
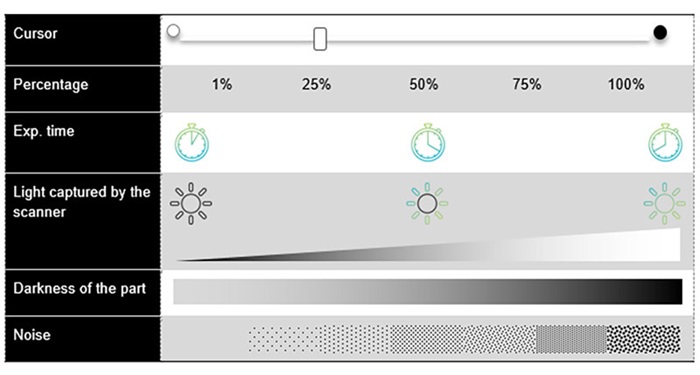
Figure 1: Scanner settings adjustment options
What is SHINE?
SHINE stands for Systematic High Intelligence Noise Elimination.
It is a patented type of High Dynamic Range (HDR) technology that allows measurement of surfaces of different colours and levels of glossiness in a single scan pass. By using three different exposure levels for each measured scan line, all surface information is captured using the optimum settings at all times; one low-level exposure captures light or matte surfaces; a second high level exposure captures high-gloss and dark surfaces; and a medium-level exposure is used for other surface types.
Because SHINE ensures that the scanner is always operating in its optimum configuration, the range of surfaces that can be scanned is wider than with conventional scanners. Furthermore, this automatic adjustment to optimal exposure levels also allows for much cleaner data collection, avoiding the noise created when scanning at suboptimal exposure settings.
For the user, SHINE is a game changer, allowing them to simply pick up and user a scanner with very little training. Knowledge of the scanner settings described earlier in this document is not necessary, so parts can be scanned accurately without the variability caused by different interpretations of the settings. Operator A will obtain the same results as Operator B, regardless of their experience or skill level.
Another benefit of having fully automatic settings is improved reproducibility. When scanners had their exposure settings manually set, results between different users who used different settings — based on different personal preferences — were an issue. By using SHINE, different users will get the same result, making for a much more consistent metrology tool.
SHINE also saves time, as there is no need for running trials on the part before starting the measurement job. The SHINE algorithm could be compared to the best automatic camera settings ever developed; imagine a camera that can take photos in automatic mode better than a professional photographer — that is what SHINE offers.
The Absolute Scanner range and their positioners
A laser scanner works by capturing 2D scan lines from the part surface. To provide a final 3D point-cloud to the user, this 2D information from the scanner must be combined with positional data that locates it in 3D space. This positional data comes from a ‘positioner’, which generally carries the scanner around the part. Examples of positioners include articulated arms, laser trackers and CMMs. The Absolute Scanner AS1 was the first scanner on the market that is compatible with multiple positioners, so that it can be swapped between laser tracker and portable measuring arm systems on the fly.
Laser trackers are portable systems able to accurately measure 3D points over large distances in any environment. Hexagon’s range of laser trackers are known as Absolute Tracker systems, named for the Absolute Encoders that ensure their high performance. They can be used to inspect parts from a size of just a few centimetres up to a those with a measurement volume of 160 metres in diameter. A laser tracker’s strength is on medium-to-large-sized objects like car bodies, railway bogies or coaches, aerospace frames and energy turbines.
For objects that are up to 4.5 metres long, a portable measuring arm is a strong alternative measurement solution. Hexagon’s range of portable measuring arms are known as Absolute Arm systems, also named for those vital Absolute Encoders. They are portable coordinate measurement machines that can be easily carried to a measurement object and they offer both tactile and contactless measurement options. For decades, the portable measuring arm has been in use in almost every manufacturing industry, due to its reliability, versatility and portability.
![]()
![]()
The AS1, and its big brother the Absolute Scanner AS1-XL, is compatible with all AT960 Absolute Tracker models, as well as with RA8 7-Axis Absolute Arm models. The modular design and RDS software integration allow the user to swap an Absolute Scanner between the Absolute Arm and the Absolute Tracker AT960 and use it right away with no additional scanner alignment.
An Absolute Scanner can even be used straight out of the box, as no warmup time is required when powering on. That’s important not only for multi-instrument use cases, but also for automated cells with a tool changer.
The cross-platform compatibility of the Absolute Scanner range allows customers to minimise their investment, by sharing a single scanner between two instruments. On top of that, inspection of large structures is not always possible with a laser tracker due to line-of-sight issues. The combination with the portable measuring arm makes any measurement task possible.
The HP-L-10.10 laser scanner range
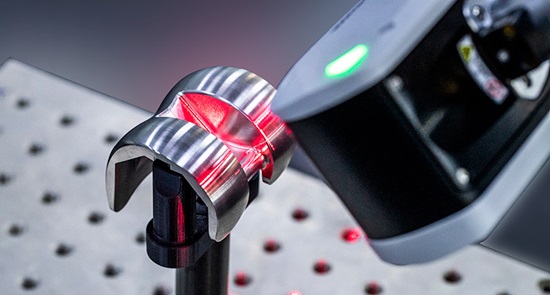 For the HP-L-10.10 laser scanner range, the coordinate system is provided by a full stationary CMM. This includes Hexagon’s range of bridge CMMs for high-accuracy measurement, as well as horizontal arm and gantry CMMs for measurement of large parts.
Manufacturers employing ultra-high-accuracy CMMs have previously become accustomed to trading speed for that high level of accuracy when implementing 3D scanning solutions. Thanks to SHINE, the HP-L-10.10 range allows CMM scanning to offer similar repeatability and performance to tactile measurements carried out on the same measurement machine; the scanner is seven times faster than its predecessor while simultaneously delivering accuracy (probing form error) to within as little as 8 microns.
Achieving this level of speed and precision along with excellent data quality and the ability to inspect a wide variety of surfaces and finishes within the same measurement sessions would simply be impossible without the advanced algorithms built into the SHINE platform.
What it all means for 3D scanning
SHINE is a powerful set of algorithms that have transformed the usability of 3D laser scanning. Embedding this technology in the Absolute Scanner AS1 and AS1-XL, as well as the HP-L-10.10 and HP-L-10.10 LITE, has created a range of scanners like no other on the market. Delivering fast, accurate results with minimal user input, our 3D laser scanners empower our customers to solve the challenges of virtually any application in manufacturing inspection.