Process reliability and quality are the maxims
Paul Horn GmbH - Germany
Contact us

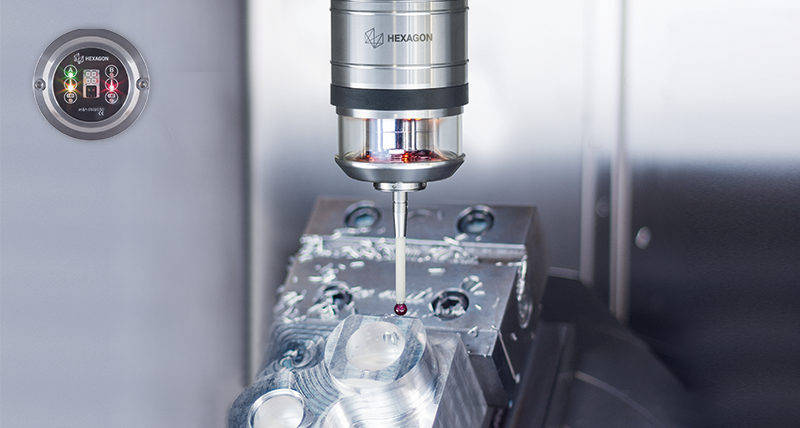
With their own in-house developed grinding machines, for tool maker Paul Horn of Tübingen, in-process on the machine measuring is a key function to ensure precision and efficiency of automated operations. The m&h 41.00-PP production touch probes continuously resist persistent coolant showers and grinding dust abrasion.
Tools from the carbide tool manufacturer Paul Horn in Tübingen are known for their high quality standard, cutting performance and sometimes unconventional solutions. The carbide inserts for these tools are ground on in-house designed machines. Nearly all of these grinding machines are automated. Even small batch sizes of inserts for special cutting tools, such as with individual geometries are produced by automated manufacturing.
In order to ensure consistently high precision of moulds during grinding, permanent measuring as well as in-process, is indispensable. Not just ground moulds are measured. With such close tolerances it is essential to permanently monitor the thermal growth of the machines. During production at Horn they already compensate for deviations of more than 1.5μ on certain machines and indexable inserts. “It’s really about microns here,” confirms Walter Wiedenhöfer, production manager at Horn. Measuring sequences are based upon specific requirements of the products and the prevailing condition of the machine. When production starts, first we measure and compensate, if necessary, after each workpiece. “When the values level off, we extend the measuring interval of the workpieces,” tells Jürgen Bahlinger, responsible for CNC programming and production processes at Horn.
Automated production is at a very high level at Horn so process reliability is of especially high significance. The production process must run without any failures, producing to very close tolerances for either large or small batch sizes. Final inspection of cutting inserts ensures quality for the customer but is no use for single items. The target is to achieve zero-defect production. After receiving a recommendation from somebody outside the company, Horn tested the m&h 41.00-PP production touch probes a few years ago. “It turned out to bequite.imple because they are compatible with interfaces from other manufacturers,” explains Jürgen Bahlinger. So they took the first opportunity to remove an existing probe and fit an m&h 41.00-PP production probe. “It worked immediately.”
What started with five probes as a test is now a standard item at Horn today. More than one hundred m&h probes are now being used. “It’s definitely best not to hear anything in particular about machines and their components as a production manager,” explains Walter Wiedenhöfer. “And I don’t hear anything about the m&h probes“! The installation of the probes is very easy as the interface and switching to the control is integrated in the probe mounting base to save space. Different types of mounting bases allow for various fitting positions. A cable connects the base/interface to the control. On the Horn grinding machines the production probes are subject to extreme strains. Depending on the machine, there are different installation positions. The probes are always being sprayed with coolant and carbide grinding dust. Because of the aggressive coolant, the insides of the new Horn machines are lined with stainless steel. The bodies of the m&h probes are also stainless steel and equipped as standard with double sealing membranes, resisting coolant showers during operation. Additionally, a moving metal protective eyelid prevents dirt intrusion. “Even carbide abrasive slurry that solidifies over the weekend doesn’t have an effect on these probes,” Walter Wiedenhöfer is pleased to report.
On 5-axis machines the probes are installed laterally on the spindle housing. They follow the swivelling movements and trigger in different positions. m&h 41.00-PP production probes allow for stylus trigger force adjustment over a wide range to accommodate differing machining conditions and grinding tasks thanks to a patented, simple load adjustment. This means the probe is impervious to fast dynamic machine movements or possible vibrations that could compromise the function of the probes and cause false signals. This is what makes these probes suitable for truly universal applications, particularly on grinding machines. The list of measurements being carried out at Horn with m&h probes is correspondingly long. As well as checking for thermal growth on the machines, critical dimensions are measured on the carbide cutting inserts being ground. Also, different measurements are made for position monitoring and checking the orientation of the automatically loaded blanks. When verifying the clamping concentricity of certain cutting inserts, a position tolerance of just 3.0 μm is allowed. Grinding wheel wear is also monitored by m&h probes. By measuring the seal washer before and after wheel dressing, the change in diameter is measured. By considering the amount of infeed, the actual grinding wheel diameter can be determined precisely. This means the highest precision is ensured during the process. Work specific measuring programs have been developed at Horn, using the simple measuring commands of the control, and these are integrated into their in-house measuring cycles. They determine the current active variables of workpieces and machines to precisely adjust the CNC program for the respective grinding wheel insert and the actual position of the workpiece.
For the people responsible at Horn, integrated measuring with high precision and trouble-free cycles is crucial for accurate and reliable production. The integration of measuring on the CNC grinding centres is what makes automation consistent. “This is the only way to manufacture identical workpieces to close tolerances, enabling lowmanpower operations that are highly reliable in their process,” Walter Wiedenhöfer describes his findings. Horn has had a lot of positive experiences from using m&h 41.00-PP production probes on theirown in-house developed grinding machines. This is why the probes are used in the production of many different indexable inserts. They are responsible for the production of high precision grooving and parting-off tools with double and triple edged cemented carbide inserts. Probes are also used to guarantee the contour accuracy of circular milling cutters, supermini tools for external machining and various types of successful milling tools produced by Horn. It is no wonder that the next grinding machines at Horn will be equipped with m&h probes

