‘Off-the-shelf’ automated shop-floor inspection for aerospace

Hexagon laser tracker technology powers a ground-breaking automated inspection package for advanced aerospace manufacturing.

Non-contact laser scanning with T-Scan provides rich information

Having worked with Hexagon and its subsidiaries for over a decade, INSPHERE has a well-established history of using Hexagon metrology solutions to enhance advanced manufacturing, particularly in the aerospace sector. The company provides contract measurement services and expert measurement training, alongside developing custom measurement installations.

INSPHERE has worked with a wide range of customers across a variety of sectors, from Airbus and GKN in aerospace to Vestas and GE in energy, as well as prominent research organisations such as the National Composites Centre and the National Physics Laboratory.

Automation integration is a key focus for INSPHERE. This growing segment has seen them become the driving force behind a large number of robot-based measurement installations powered by Hexagon metrology technology. A recent development in this area has seen INSPHERE create the HYPERSCAN concept – an in-line non-contact automated inspection system in a standardised cell configuration.
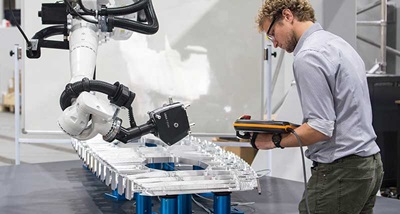
Automated shop-floot inspection with laser tracker technology“HYPERSCAN is an innovative ‘off-the-shelf’ solution for automated shop floor inspection,” said Ben Adeline, CEO at INSPHERE. “It’s ideally suited to large components where the use of a traditional CMM would be impractical due to environmental conditions and too expensive due to size.”

Conventional hand-tool oriented inspection methods are time-consuming and labour-intensive operations with high potential for mistakes when recording results. On the other hand, automated metrology solutions traditionally utilise coordinate measuring machines (CMMs) – commonly gantry-based with three-to-five axes and a tactile touchtrigger probe. They tend to be somewhat inflexible and are impractical when the inspection of large components needs to be performed quickly, close to production and with noncontact measurement technology. 

The HYPERSCAN concept was built on the development of a custom automated system to deal with these exact challenges for leading aerospace manufacturer GKN. “HYPERSCAN was born out of the fact that GKN had been looking for a better solution than CMM and hand tool measurement for their ribs,” explains Craig Davey, COO at INSPHERE. “They were doing key acceptance dimensional checks on their ribs on the shop floor using micrometers, height gauges, standard hand tools. If there were any issues, they’d send the rib for a full CMM check, which takes a couple of hours and is in a different building and is a bit of a hassle – it causes a big bottleneck. And it means that if they’ve got a machining problem, they don’t find out until a week later when they’ve made a bunch of ribs on a worn tool, for example, and all their holes are the wrong size.” 
"The T-Scan is more capable than we expected for difficult surfaces, and I think better than its competitors on difficult surfaces."
The other important aspect of GKN’s sought-after solution was in the area of data management. “At the time, they just had hand signatures saying that ribs were okay, and they wanted something that would instead give them some data that they could check back on, allow them to use that data to look at machining variation, but also just to have something reliable and traceable.” 

Non-contact measurement systems provide information-rich datasets, not only enabling features to be evaluated, but also providing good diagnostic information to help understand manufacturing trends, deformations and surface details. The ability to improve data quality and effectiveness while also significantly raising productivity is a key benefit for an automated robot installation, which were the results GKN was looking for.

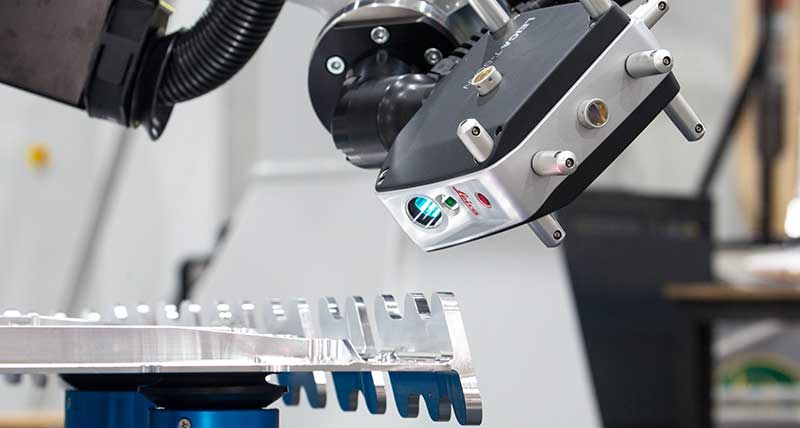
Automated shop-floor inspection for aerospaceFollowing some disappointing results after testing automated systems based on optical 3D scanning and laser radar technology, INSPHERE proposed a laser tracker-based automated system that used Hexagon’s Leica T-Scan 5 laser scanner for data collection.

“Initially, we were acting as an independent consultant, testing Hexagon equipment to see if it could achieve what they needed to inspect their ribs,” explains Davey. “We took a selected number of features off the ribs and flat surfaces, some thicknesses and some hole dimensions. And then we’d do dozens of repeat measurements of each feature. And then look at the variability, tweak the settings a bit to scan and see what was achievable with the system.”

Aerospace components are particularly challenging to measure with non-contact systems; components may be freshly machined aluminium (very shiny) or may be carbon fibre (both absorptive and reflective), and these can be at the limit of capability for non-contact sensors, particularly when inspecting against tight aerospace tolerances. 

“The team at GKN were really encouraged by the results of our initial testing because these ribs are super shiny metal and just not easy to measure with a laser. But if you go sufficiently controlled with a robot, it’s possible. If you try and do a test with a hand scanner, you just never get the data – you need to have that level of control that you can get through a robot mounted system.”

More in-depth testing continued with very positive results until GKN we satisfied and ready to press ahead with the creation and installation of a full production system based on the INSPHERE concept. “Today, we’ve built the solution, we’ve delivered it to GKN, and it’s currently working, it’s in use today at GKN measuring ribs with a 20-minute complete cycle time” says Davey. 
"The upshot of this good experience with GKN is that we realise what we had was not just a good solution for GKN, but a good aerospace solution."
That’s a significant time saving compared to the previous process, where manual checks with no resulting useful data would take 30 minutes per rib, while a full CMM check is 90 minutes, plus the time needed to carefully move the large workpiece to the quality room. Once GKN have completed their ongoing industrialisation phase of the project, the fully up and running system is expected to be processing up 60 ribs a day on a 24/7 cycle, with every piece backed with complete, reliable and traceable geometry data.

“The upshot of this good experience with GKN is that we realise what we had was not just a good solution for GKN, but a good aerospace solution,” explains Davey. “There hasn’t been much traction with automated scanning in aerospace, but we’ve now got all this data that says we can do it well. So we then developed the HYPERSCAN concept as a kind of off-the-shelf product – an alternative to having to go through a two-year research programme to get a solution. Customers can now just buy it from us as a solution, and we already know what the system is capable of.” 

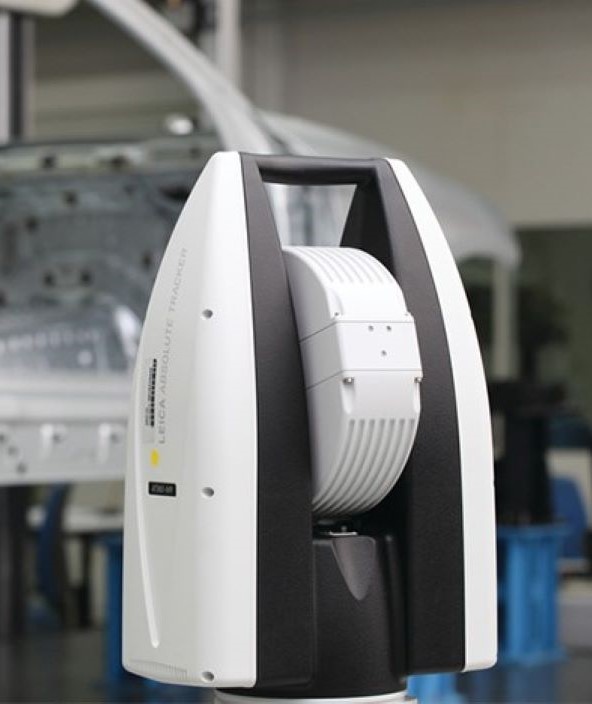
Roboter-based measurement installation at InsphereThe current iteration of HYPERSCAN is a standardised cell configuration that uses industrial robots for measurement sensor positioning and an external metrology system – the Leica Absolute Tracker AT960 laser tracker – to provide global accuracy. With a Leica T-Scan 5 laser scanner mounted on the robot and tracked using the 6 degrees of freedom measurement capabilities of the AT960, the system can deliver highly dynamic and detailed surface measurement data at high speeds.

The HYPERSCAN system has the advantage of being able to scale at a relativity low cost to large volumes of around 30 metres in diameter, as the positioning system (robotics and linear rails) does not require inherent accuracy over such distances – the accuracy of the system is determined by the tracker. This particular technology solution is naturally well-suited to large aerospace components such as those found in wing manufacturing, but is also applicable for example in turbine production in the energy sector and in body-in-white inspection in automotive.

By using high-quality linear rails and robotics, the T-Scan 5 laser line scanner is very repeatably positioned as it moves around the measurement object, following the same paths each time, which in turn makes the measurement more robust and repeatable. Subsequently these paths can be optimised for the particular features in question, including optimisation for material reflectivity.

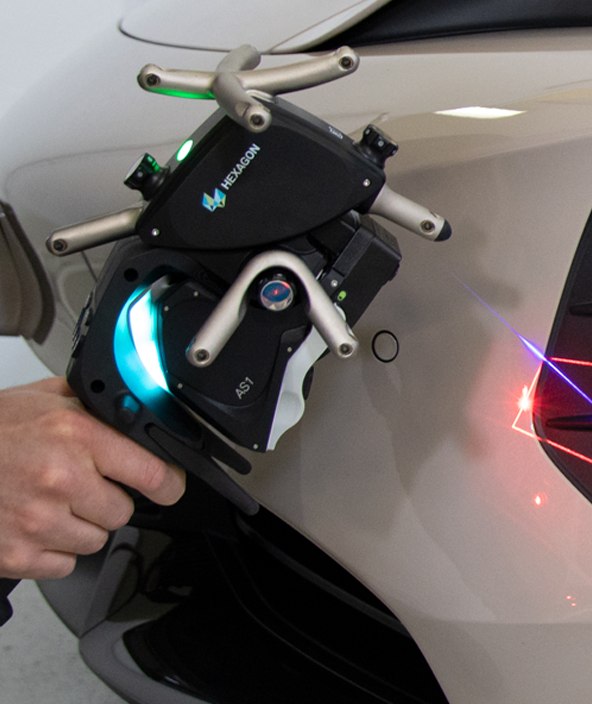
The team at INSPHERE have had a good experience working with the T-Scan 5 as they developed their HYPERSCAN concept. “The T scan is more capable than we expected for difficult surfaces, and I think better than its competitors on difficult surfaces,” says Davey. 

“Composite surfaces and shiny metallic surfaces are very, very difficult for non-contact measurement. Everyone talks the talk, but the T-Scan is doing a really good job of actually achieving what it sets out to achieve on those surfaces. And I think that’s the big challenge of aerospace more than the tolerances involved. It’s easy to know what you’re going to achieve in terms of capability because the laser tracker is a very tried and tested technology. What’s difficult, what’s the big variable in that, is the surface. And I think the T-Scan performs better than people realize.” 
"We’ve built the solution, it’s in use today at GKN measuring ribs with a 20-minute complete cycle time."
The HYPERSCAN concept also allows a degree of flexibility and future proofing. For instance, there is the possibility to adapt the system with alternate sensor heads; this could be a laser line scanner, structured light scanner or dedicated hole measurement device such as Hexagon’s Absolute Camera AAC, which is designed to measure the sort of repeated small drill holes commonly found in large aerospace components. With an integrated tool changer the system, can even be adapted to automatically switch between various sensor heads within a predefined measurement programme.

Furthermore, a HYPERSCAN cell can include integrated measurement guidance systems for wireless hand tool operations, for those situations where automated metrology solutions currently fall short of the manufacturing requirements. With the AT960 providing the positional component of the measurement, a Leica T-Probe can easily be added to the system for integrated handheld probing measurement. Such an approach allows the advantages of automation to be realised, while still maintaining safe integration with more manual approaches where required. This holistic measurement approach ensures that consistent, high integrity datasets are generated.

The T-Scan is scanning also highly reflective surfacesAnother HYPERSCAN adaptation was something that was actually developed as part of the final system delivered to GKN – a projector built onto the cell to assist with part positioning.

“We put a works projector on the ceiling of the cell that projects down to initially show the positions where the operator needs to place the vacuum pillars needed for this application,” explains Davey. “And then you move the projection sequence on and it shows a kind of ghostly outline of a rib for alignment, followed by some key point indicators to show that they’re in the right place. It’s a really useful tool for operators to have way of putting things within a couple of millimetres of where they should be in a cell. It’s not super expensive and it’s very easy to use – it’s quite a handy option.”

The HYPERSCAN system is a clear demonstration of the way Hexagon metrology technology can be used to power the potential of Industry 4.0 by ensuring largescale actionable data can be collected without sacrificing production productivity. It also shows how this type of advanced technology can be effectively packaged as an off-the-shelf, customer-friendly solution for fully automated inline inspection. 

Laser Tracker Automation

Our laser tracker-based robotic measurement and control systems are about elevating the potential of industrial automation and bringing metrology-grade accuracy to the world of smart manufacturing.

Leica T-Scan 5

The Leica Absolute Tracker takes your scanning experience to a new level of excellence in volumes up to 60m (Ø) in a single set-up.

Industrial 3D Laser Scanners

Laser scanners play a key role in quality assurance. 3D digital capture of shapes and surfaces using lasers is an effortless and precise process. The industry uses laser scanners primarily for the quality control of geometries and surface, but also for reverse engineering, fit and finish, and assembly applications.

Laser Tracker Systems

A long-term standard in industrial metrology: Laser Tracker Systems lead the field in terms of the accuracy, reliability and durability of portable coordinate measuring machines.