Automated optical measurement as an engine of modernisation and innovation
Two new robotic measuring cells from Hexagon represent a new generation of innovative automated optical 3D measurement across the entire Volkswagen Group.
Contact us
Smart measurement automation in automotive with ŠKODA AUTO
Leading automotive manufacturer ŠKODA AUTO has now been a part of the Volkswagen Group for 30 years. During this time, it has developed into a strong and internationally successful company offering ten different vehicle model lines across worldwide markets. With the emerging trend of clean mobility, it plans to further expand its portfolio, and not only with electric cars.
ŠKODA AUTO operates at three sites in the Czech Republic. The main factory is located in Mladá Boleslav, with the other two to be found in Kvasiny and Vrchlabí. Vehicles bearing the winged arrow logo are also manufactured in China, Russia, Slovakia and India, primarily through Group partnerships, as well as in Ukraine with a local partner.
![]()
Hexagon and ŠKODA AUTO have been measurement partners for decades. This mutual cooperation moved to an even higher level at the end of 2018, when the companies concluded an agreement to support ŠKODA AUTO in reconfiguring their inspection processes for 3D optical systems instead of tactile measurement. This programme has resulted in a significant increase in measurement capacity and quality, as well as the digitalisation of outputs from measuring devices. This was achieved through the modernisation of several installed coordinate measuring machines (CMMs), but above all through a unique installation of two fully automated smart measuring cells for the measuring centre in Mladá Boleslav.
Effective offline programming of robotic measurement
In terms of software, the measuring cell is equipped with Hexagon’s leading metrology platform PC-DMIS – the same software solution in use throughout all ŠKODA AUTO´s factories in the Czech Republic. The use of a single software platform across the factories has a number of practical advantages, such as the uniform integration of VW Group measuring principles directly into PC-DMIS. It has also added technical value in the possibility for the offline preparation of measuring programs.
A significant shift in the development of PC-DMIS in recent years has made it possible to take full advantage of offline programming. The operators of the new measurement cells in Mladá Boleslav have been able to make the most of this capacity, which allows them to start measuring very quickly when the production of new parts is launched.
Until now, ŠKODA AUTO has used offline programming in only a limited capacity, typically for tactile measurement on traditional CMMs. But with the new HxGN Robotic Automation software, which Hexagon officially launched in 2021, this functionality within PC-DMIS can now be more fully taken advantage of in the context of optical robotic measurement.

“The HxGN Robotic Automation software significantly reduces the time required for the offline programming of robotic measurement and the debugging of measurement programs”, says Martin Jehlička, manager of the measuring centre in Mladá Boleslav, responsible for measuring technologies in the field of car production. “The results of comparative measurements confirmed the effectiveness of the new solution and are a good prerequisite for the implementation of this software for other robotic measuring machine tasks."
“Hexagon’s fully robotic measuring cells are the first embodiment of our cooperation in the field of optical measurement, but it is already clear that this is just the beginning. We would like to continue other projects as soon as possible, and use the HxGN Robotic Automation Software for in-line and at-line measurement.”
Tailor-made smart solution
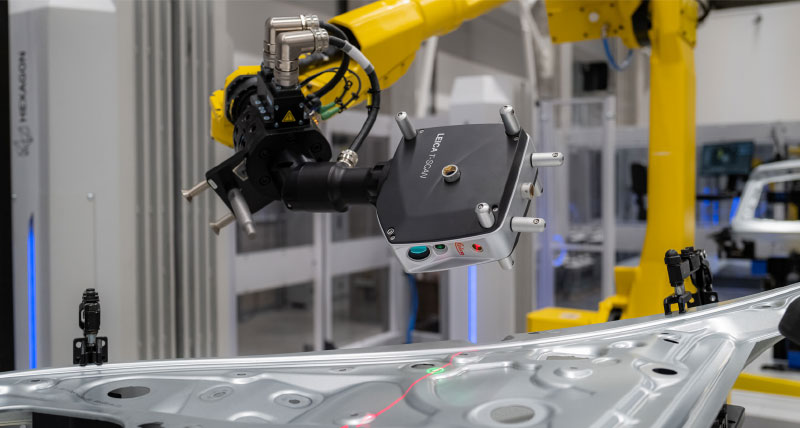
The measuring cell itself is based on robotic absolute measurement powered by the large-volume measuring capabilities of Hexagon’s advanced laser tracker and 3D laser scanner technology.
“These systems are the real key to productive and highly accurate robotic measurement”, explains Jaroslav Veselý, who leads Hexagon’s Manufacturing Intelligence division in the Czech Republic. “The Leica Absolute Tracker AT960 is capable of six degrees of freedom (6DoF) measurement as standard, allowing the use of a 3D laser scanner or probe from up to 60 metres away."

“Ensuring fully automated control of the dimensions, shapes and positions of measured elements is then just a matter of programming using a unique combination of integrated Hexagon accessories within the cell – from interconnected metrology and programming software, selected rotary tables and flexible fixtures to the new cell control system architecture. The system as configured ensures fast data exchange between all peripherals and therefore enables the automatic creation of measuring programs based on CAD data of parts and jigs, as well as measurement simulation, the precise positioning of clamping jigs according to reference points, and last but not least the fast evaluation of large volumes of scanned data into graphically presented measurement results.”
Extended use for the FIVE U-nique fixturing system
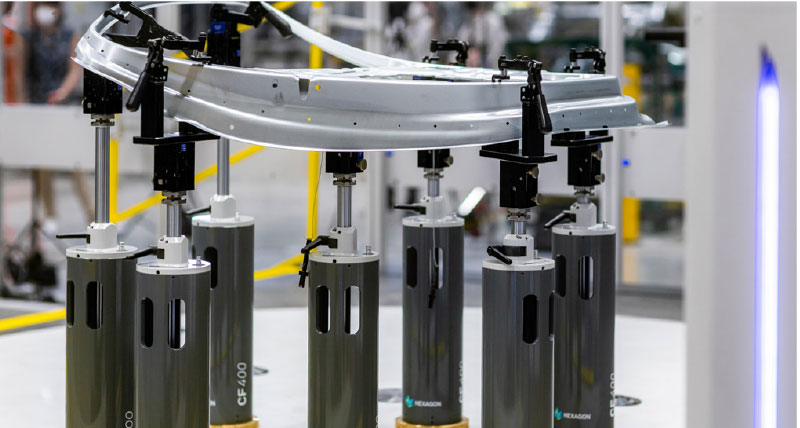
The smart cells also contain two workstations with rotary tables that use the flexible magnetic FIVE U-nique fixturing system, which allows accurate fixtures to be rapidly built for an unlimited number of part configurations to provide support and reference to the workpiece. The FIVE U-nique system provides considerable flexibility to automated measurement processes due to its reduced installation time, allowing for fast changes between configurations.The reference position of each part-holding fixture is automatically determined from the CAD data of the part. The robot enters this position with a special tool from the tool changer and thus determines the final position and height of the fixture for the location. Thanks to this, a quick readjustment of the jigs for all measured parts is ensured, which significantly reduces the financial demands of acquiring and storing individual fixed configuration jigs for every part.
![]()
The accuracy of the jig placement is defined by the accuracy of the measuring system, in this case a high accuracy laser tracker and scanner. This system measures the position of the robot as it positions the part-holding fixtures, and subsequent iteration ensures zero deviation from the reference position. The well-established FIVE U-nique system has previously been used to position parts exclusively in coordinate measuring machines, but this new concept developed especially for ŠKODA AUTO demonstrates how this trusted solution can still play a role in the world of smart manufacturing.
The HxGN Robotic Automation software significantly reduces the time required for the offline programming of robotic measurement and the debugging of measurement programs.


