Optical measurement of blisks
Inspection of aeroengine components with high throughput and accuracy
Would you like to know more?

Blisk is a portmanteau of ‘bladed disc’ and describes a one-piece rotor on the compressor side of a gas turbine. A blisk has fewer components than a conventional blade and disc assembly, and offers lower weight and drag. Because they eliminate high-drag blade locators and fixings, blisks can give an 8% efficiency increase. Blisks were first produced in the 1980s for the T700 engine used in Black Hawk and Apache helicopters, and are now a mainstay of military and civil aeroengines. The functional features of blisks are the locators and fixing holes on the disc, and the surface profile and location of each blade. To prevent unwanted resonances and imbalance, it is important that these features are aligned to each other.
A blisk is a complex component with a very high added-value. The machining cycle time is measured in days, not seconds, so it is important to know that a good part will be produced before the machining operation starts. To achieve the necessary compression ratio, a blisk blade has a very slim profile with sharp, rounded edges, presenting a metrology challenge. The surface profile has a tight tolerance; however, the location has a relatively open tolerance. This combination means that it is quite easy to ‘overshoot’ the part during measurement, leading to the capture of incorrect data or no data at all. The tactile method of inspecting blisks can capture the data adequately, however with the increasing use of exotic surface coatings, manufacturers are seeking non-contact inspection methods which offer accuracy without the risk of the measurement process distorting or marking the part.
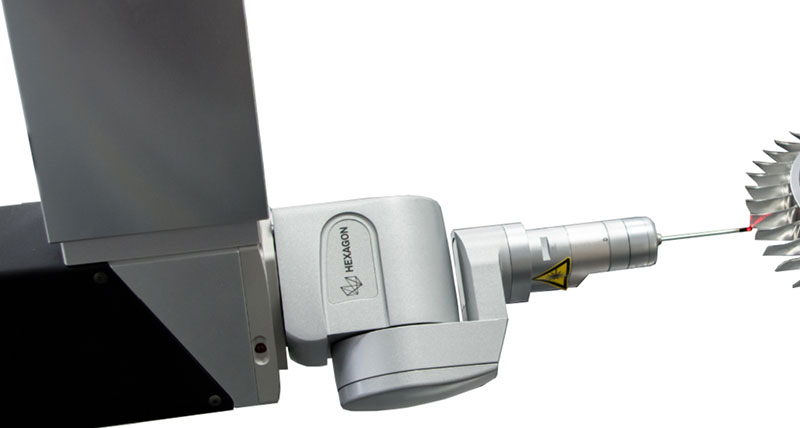
The production process for such complex parts can only be controlled if the measurement data can be captured reliably and in sufficient detail. The change from the traditional tactile-only to a hybrid tactile and optical solution brings more detail into the process at a much faster rate, making process control more precise, faster and more reliable. With a resolution of 0.003 μm and a Ø11μm spot, the HP-O Flex 90 interferometric distance sensor from Hexagon Manufacturing Intelligence offers an ideal solution for blisk inspection. The sensor accurately captures high-density data in a production environment without impact from changes in ambient light. It can also capture shiny surfaces, so coated and polished blisks are no challenge.
To capture the point data reliably, the sensor must be positioned so it ‘looks’ perpendicular to the surface to be measured. With the HP-O Flex 90’s indexing head, this is possible. The HP-O Flex 90 has an integrated optical fi bre and a universal connector to facilitate both tool and sensor changes. With 2.5° indexing in two axes, the sensor can be precisely orientated to the part. Tactile and optical sensors can be used within the same measuring program.
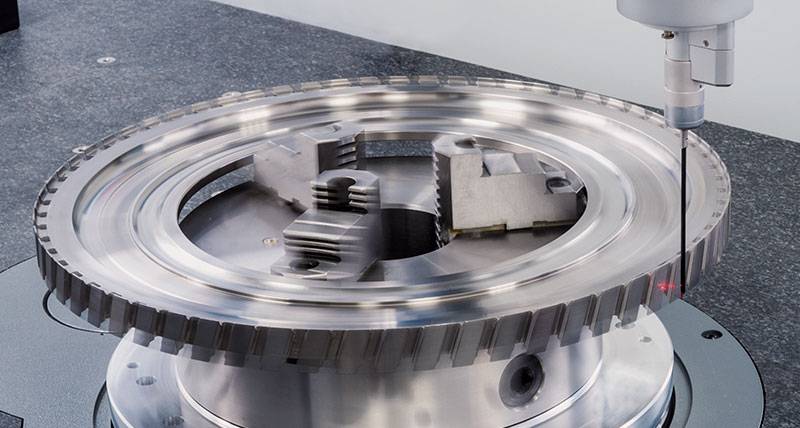
Unlocking the potential of the HP-O Flex 90 sensor requires a machine with the appropriate accuracy, dynamics and 4-axis capability. The secret to reducing the cycle time is the software-controlled ‘ladder-scan’ technique for capturing the aerofoil features. In ladder-scan mode, the software generates a single 4-axis moving path with a user-defined undershoot/overshoot at the start or end of each section, which moves over the part surface and captures the complete aerofoil. All the surface points inside the focus range of the sensor are captured, those outside are ignored. The undershoot/overshoot is defi ned so parts that are potentially out of tolerance can be captured reliably.
Gas path features such as the annulus, fillet radii and radial sections are captured in continuous scanning mode. Coordinate Measuring Machine (CMM) parameters are automatically adjusted to suit the surface being measured. Variable high-speed scanning (VHSS) is used to modify the scanning speed in all four axes simultaneously, so for example the CMM slows for a small radius of curvature and speeds up when the radius of curvature increases.
The change from tactile-only to a hybrid tactile/optical solution offers a completely new approach to blisk measurement. Hexagon’s high throughput and acccuracy (HTA) solution of a Leitz Reference 4-axis CMM, HP-O Flex 90, HP-S-X1 tactile sensor, ladder-scan mode and VHSS technologies with QUINDOS metrology software enables blisk manufacturers to reduce cycle time by up to 50%.
