Ergonomic lightweights
RECARO Aircraft Seating - Germany
Contact us
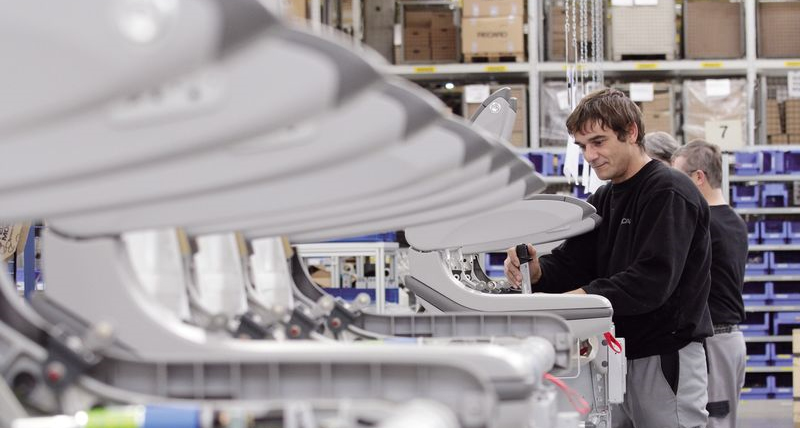
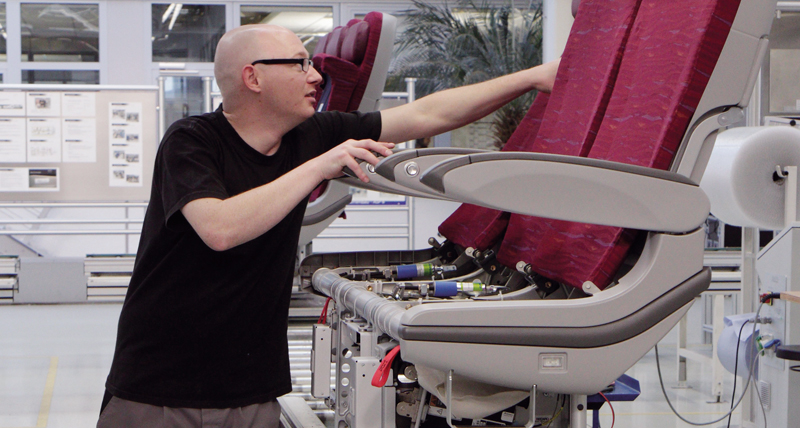
Airlines and aeroplane manufacturers are facing the challenge of transporting people and freight more efficiently. The only way to do this is to put every single aircraft component on a drastic slimming diet, but the RECARO Aircraft Seating company won‘t be compromising the ergonomics or comfort of their aircraft seats for the economy and 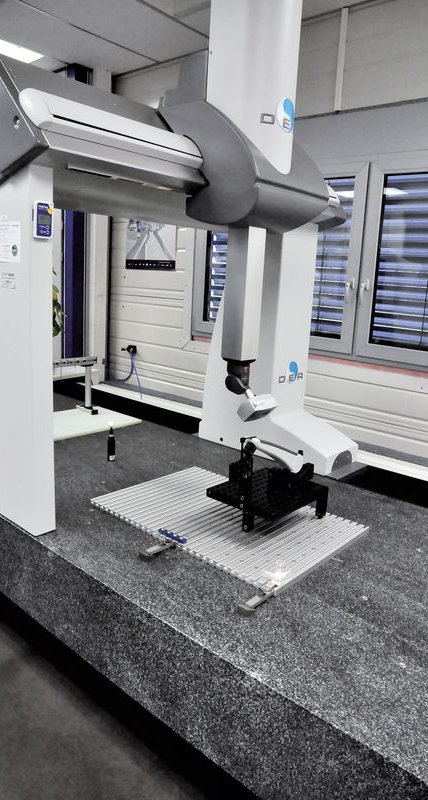 business classes. Instead, the company will be maintaining their high quality standards and betting on their well-positioned development department, with support from a DEA GLOBAL 3D coordinate measuring device from Hexagon Manufacturing Intelligence.
Admittedly, a seat like this doesn‘t have it easy. It‘s got to hold up to use seven days a week, often 20 hours a day, over a lifespan of up to 30 years. Alongside reliability, lightweight construction is high on the check list of RECARO‘s developers at company headquarters in Schwäbisch Hall. More weight requires more fuel, which translates to higher expenses, and in this dynamic market, every saved litre of kerosene counts. The seat specialists at RECARO are focused intently on sitting itself. Ideally, airline passengers should arrive at their destination more relaxed than at boarding time.
How do the idea generators at RECARO find a balance between the weight efficiency, ergonomics, comfort and reliability of a seat? The company‘s development departments get essential impetus and ideas from measurement technology. Up till very recently, individual parts were still measured with a boom machine, a process requiring considerable manual effort. To comply with the zero-error strategy devised by the company management, RECARO had to strike out in new directions with regard to measurement technology. Accordingly, the demands placed on the coordinate measuring device to be used were high.
 requirements of the customer," explained Robin Kölz, Quality Team Leader at FAI Parts & Measurement of RECARO Aircraft Seating. Based on the variety of parts desired by the customer, which are created using a wide variety of manufacturing processes of suppliers and in-house production, it was suggested by Franz Musso, Sales Manager of Hexagon Metrology, that a DEA GLOBAL be used due to its variety of sensor technologies.
Besides being a development site, Schwäbisch Hall is also the location of in-house manufacturing using deep-drawing and laser processes and of pre-assembly as well. A variety of different materials are processed to create components which demand complete flexibility from a measuring machine. The CMS106 contactless laser line sensor is part of the coordinate measuring device. This sensor is suitable for assembly groups with wall thicknesses in the millimetre range which can only be measured quickly and with the required accuracy using optical technology. The CMS106 can even carefully examine the tilt of tables and sleeping positions, cladding film and carbon-fibre products. When it comes to analysing sheet metal profiles or cuts with even greater accuracy, for example, Johannes Mainhardt (Inspector of Quality Measurement) switches to the LSP-X1 tactile high-speed scanning sensor, fully automatically using a tool changer.
 business classes. Instead, the company will be maintaining their high quality standards and betting on their well-positioned development department, with support from a DEA GLOBAL 3D coordinate measuring device from Hexagon Manufacturing Intelligence.
Admittedly, a seat like this doesn‘t have it easy. It‘s got to hold up to use seven days a week, often 20 hours a day, over a lifespan of up to 30 years. Alongside reliability, lightweight construction is high on the check list of RECARO‘s developers at company headquarters in Schwäbisch Hall. More weight requires more fuel, which translates to higher expenses, and in this dynamic market, every saved litre of kerosene counts. The seat specialists at RECARO are focused intently on sitting itself. Ideally, airline passengers should arrive at their destination more relaxed than at boarding time.
How do the idea generators at RECARO find a balance between the weight efficiency, ergonomics, comfort and reliability of a seat? The company‘s development departments get essential impetus and ideas from measurement technology. Up till very recently, individual parts were still measured with a boom machine, a process requiring considerable manual effort. To comply with the zero-error strategy devised by the company management, RECARO had to strike out in new directions with regard to measurement technology. Accordingly, the demands placed on the coordinate measuring device to be used were high.
Material variety
"Precise measurement of work pieces is a basic requirement of making sure that the quality of the overall product meets the very high requirements of the customer," explained Robin Kölz, Quality Team Leader at FAI Parts & Measurement of RECARO Aircraft Seating. Based on the variety of parts desired by the customer, which are created using a wide variety of manufacturing processes of suppliers and in-house production, it was suggested by Franz Musso, Sales Manager of Hexagon Metrology, that a DEA GLOBAL be used due to its variety of sensor technologies.
Besides being a development site, Schwäbisch Hall is also the location of in-house manufacturing using deep-drawing and laser processes and of pre-assembly as well. A variety of different materials are processed to create components which demand complete flexibility from a measuring machine. The CMS106 contactless laser line sensor is part of the coordinate measuring device. This sensor is suitable for assembly groups with wall thicknesses in the millimetre range which can only be measured quickly and with the required accuracy using optical technology. The CMS106 can even carefully examine the tilt of tables and sleeping positions, cladding film and carbon-fibre products. When it comes to analysing sheet metal profiles or cuts with even greater accuracy, for example, Johannes Mainhardt (Inspector of Quality Measurement) switches to the LSP-X1 tactile high-speed scanning sensor, fully automatically using a tool changer.
Improved detail sharpness
The machine’s measuring range of 900 x 2,000 x 800 mm was designed to allow enough room even for large assembly groups. In addition to the flexibility of the machine, the accuracy of the DEA GLOBAL was impressive from a technical standpoint. It’s basic accuracy with the
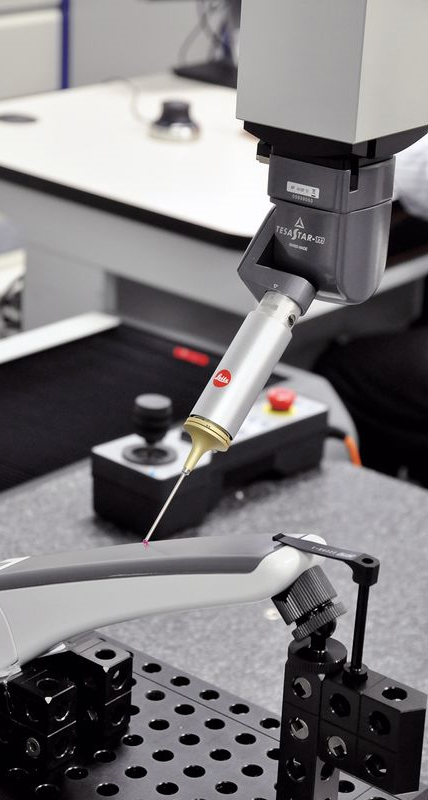 LSP-X1 sensor is 1.4 μm (micrometres). “We wanted to advance professionally in measurement technology and were able to increase the
 LSP-X1 sensor is 1.4 μm (micrometres). “We wanted to advance professionally in measurement technology and were able to increase the
 accuracy of our measurement results considerably with the DEA GLOBAL,” said Mirjam Bruhns, Director of Quality and Process Management. “Thanks to the sharpness of detail, we are in a position to make clear and unambiguous statements on the quality of parts and can reflect this knowledge back to our suppliers and internal customers. With this investment, we will be very well positioned in measurement technology for the coming years.”
Colours, not numbers
On the software side, Hexagon Manufacturing Intelligence provides the machine with PC-DMIS. This enables CAD models from any manufacturer, e.g. CATIA and SolidWorks, to be read in using standard interfaces such as STEG, IGES, DXF etc. Johannes Mainhardt commented that: “PC-DMIS is structured very logically and makes structured programming possible. For example, I can bring up tolerances on the CAD model very easily. The best part is that I can give our suppliers feedback quickly, and don’t need to use any complicated Excel files to do this. I simply use easyto-understand false-colour representations.
The DEA GLOBAL doesn’t just provide critical input on development, in-house manufacturing and assembly at the Schwäbisch Hall location, however. Should clarification be needed, other RECARO locations also send their parts to the company headquarters to be precisely examined with the coordinate measuring device.
The DEA GLOBAL doesn’t just provide critical input on development, in-house manufacturing and assembly at the Schwäbisch Hall location, however. Should clarification be needed, other RECARO locations also send their parts to the company headquarters to be precisely examined with the coordinate measuring device.
