Vehicle safety from A to Z
3D quality inspection of sheet metal hole patterns and trimmings
Kontakty
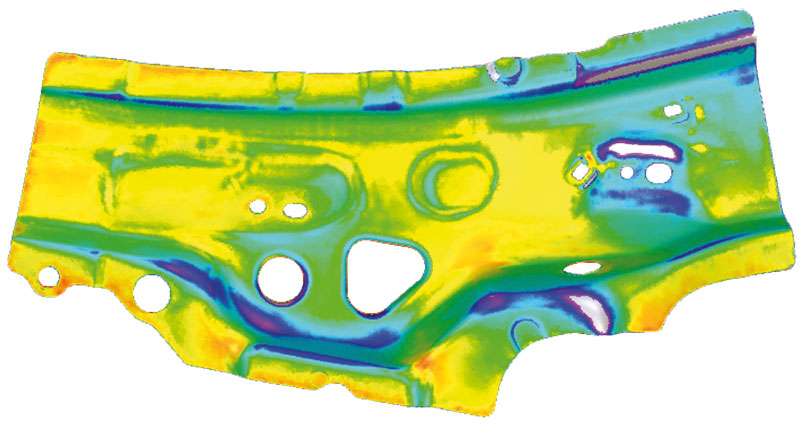
The production of automobiles can no longer be imagined without using special struts for optimum stabilisation of vehicles. In order for these metal sheet components to seamlessly integrate into the vehicle body, changes in shape as well as position and size deviations are verified with the help of three-dimensional scan data.
Identify deviations in shape, position and size
Computer aided quality inspection (CAQ) of automobile pillars based on three-dimensional scan data in combination with a professional inspection software is a simple and efficient procedure to compare the actual data of physical objects with the target data of their CAD models. Apart from shape deviations of the surface, for instance caused by warpage, also position and size deviations of holes and trimmings of metal sheets can be identified and quantified. Within a matter of merely a few minutes, these analyses provide the user with the relevant information to perform necessary corrective adaptations in order to ensure that the production conforms to specification.
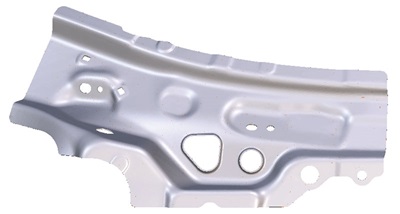
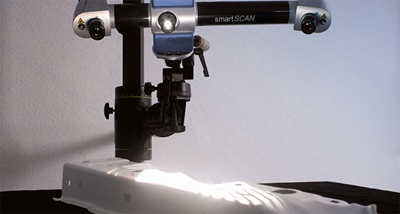 For the generation of comprehensive, conclusive measuring results regarding changes in shape as well as position and size deviations of the joint component of an Audi TT D pillar an AICON SmartScan is being used. The precise scan data of this component made of steel sheet (dimensions approx. 50 x 35 x 15 cm) allows for a holistic inspection with comprehensive and conclusive measuring results.
For the inspection of the metal components an AICON SmartScan is called into action. This 3D measuring system is characterised by its high degree of flexibility, an essential property since the measuring field, the illumination as well as the camera resolution are precisely adjusted to the individual project requirements. To perform an automated data acquisition, the scanner can be combined with a turntable and a robot.
Automated digitisation and inspection
The measuring project is carried out in two processing stages. The AICON SmartScan in combination with a turntable and the AICON software OproCat automatically generates the 3D geometry and edge data. The inspection software PolyWorks | InspectorTM by InnovMetric Software Inc. performs the quality inspection of the joint part — if required, this process may be also automated. The intuitive and user friendly software offers the possibility to compare complex scan data sets with the CAD data, serving as a basis to generate conclusive first sample inspection reports or production control protocols.
The workflow in detail:
 1. Digitisation and data post-processing
- Setup of the AICON SmartScan and the measuring object
- Using a turntable on which the measuring object positioned for reproducible scanning, the measurement is partly automated
- Three-dimensional object measurement with the AICON SmartScan
- Evaluation of the object geometry and its visualisation
- Evaluation of the trimming line and the hole pattern
- Extension of the area data (STL) to the detected edges of the measuring object (feature lines)
- Transfer of the 3D data of all surfaces and detected edges in STL format to the inspection software
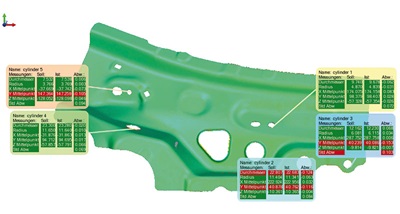 2. Inspection with Polyworks® | InspectorTM
- Importing the CAD reference data
- Specification of the inspection criteria of the CAD model: trimming lines, trimming edges; for the hole pattern: position, diameter
- Loading the scan data and the feature line data
- Automated inspection process including reporting by compiling measurement reports and archiving. The results of the quality inspection can be visualized in various forms: false color representation in 2D or 3D, tables with nominal values and tolerances, trimmings, etc.
Saves time and reduces costs
By using state-of-the-art 3D scanning technology with the AICON SmartScan in conjunction with a turntable and a high performance inspection software allows for a comprehensive 3D quality inspection of the Audi TT D-pillar joints:
- Localisation, visualisation and quantification of tolerances
- Verification of dimensional accuracy of the inspected components (e.g. first sample inspection, incoming goods inspection, random in-line production inspection)
- Verification of shape, position and completeness of drilled holes
- Verification of dimensional accuracy of sheet borders (spring rebound and trimming)
- Inspection for and documentation of shape deviations caused by inherent material properties, wear and tear, corrosion, ageing, etc.
Thanks to the rapidly conducted first article inspection, the inspection time is reduced. At the same time, the early troubleshooting and relevant corrective adjustments significantly improve the efficiency within the production.
In spite of processing vast data volumes due to the holistic inspection approach, an inspection time of a few seconds is achieved. Furthermore, early first sample inspections allow for a significant time reduction of the overall quality control process. Flaws can be identified and corrected well ahead of time, enabling the interpretation of the measurement results to be immediately exported back into the production process. In doing so, the scan data not only improves the production efficiency, but in the final result also contributes to increase the overall quality of the produced pillars and bodywork panels.
We would like to thank both partners for their kind support and cooperation in realizing this project.
